


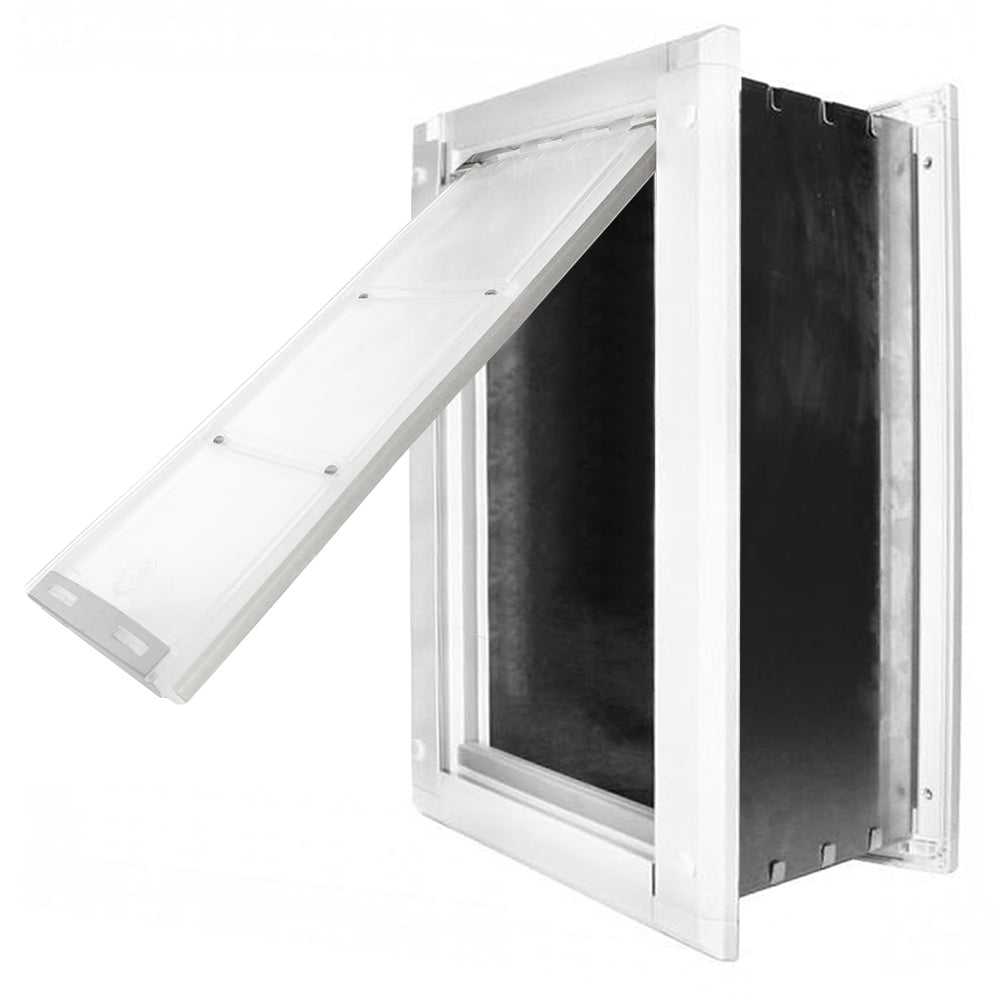
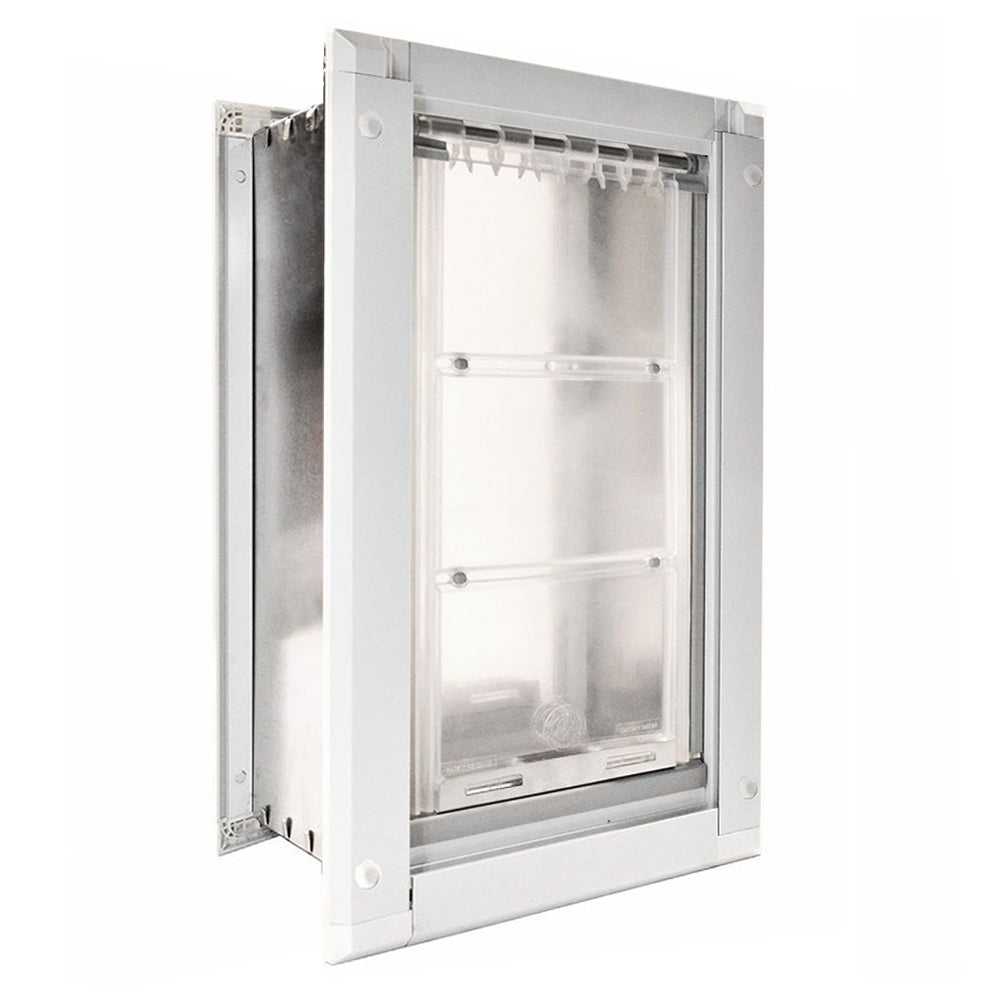
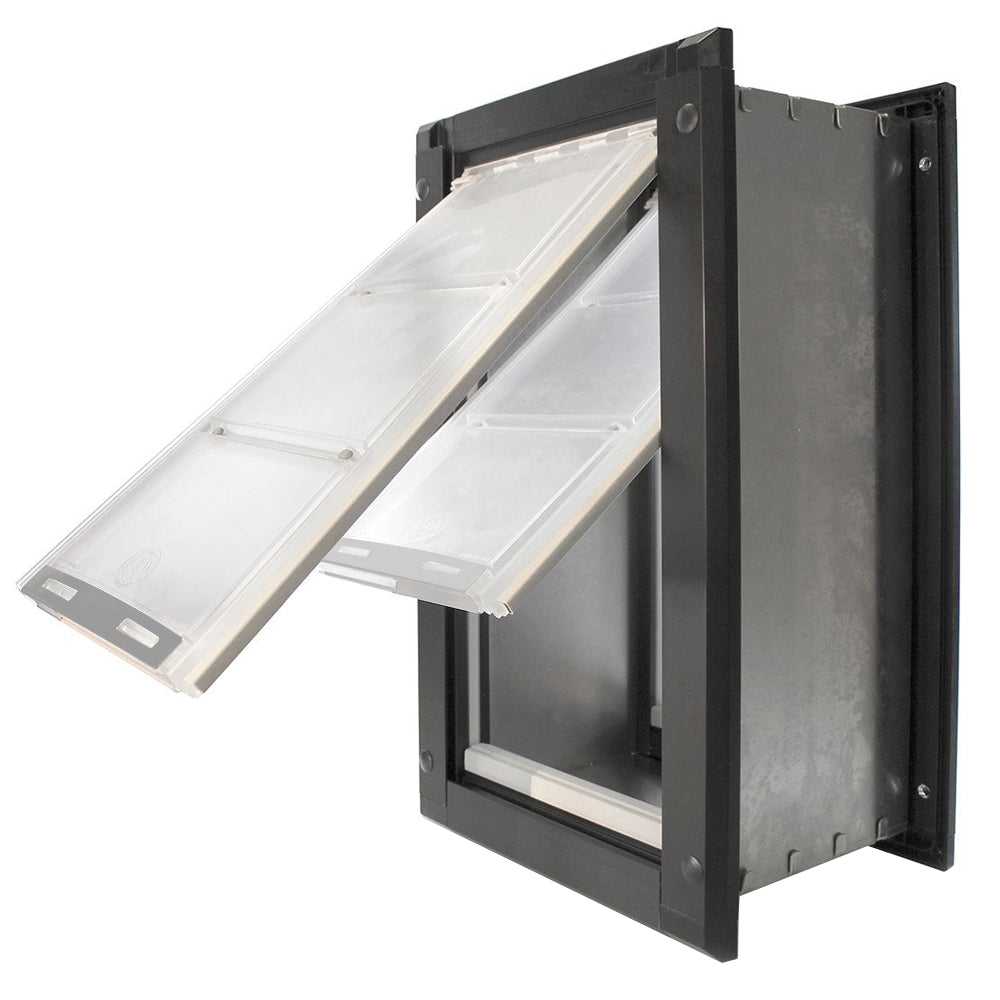
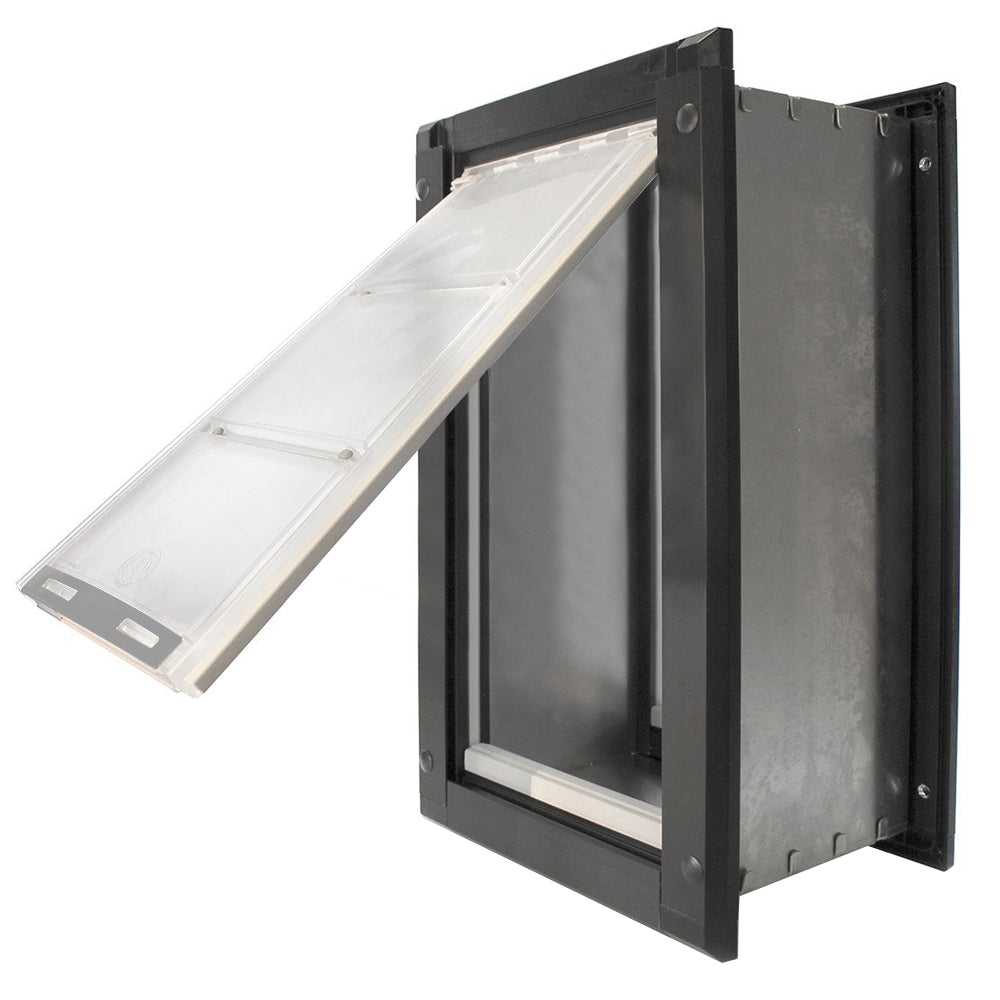
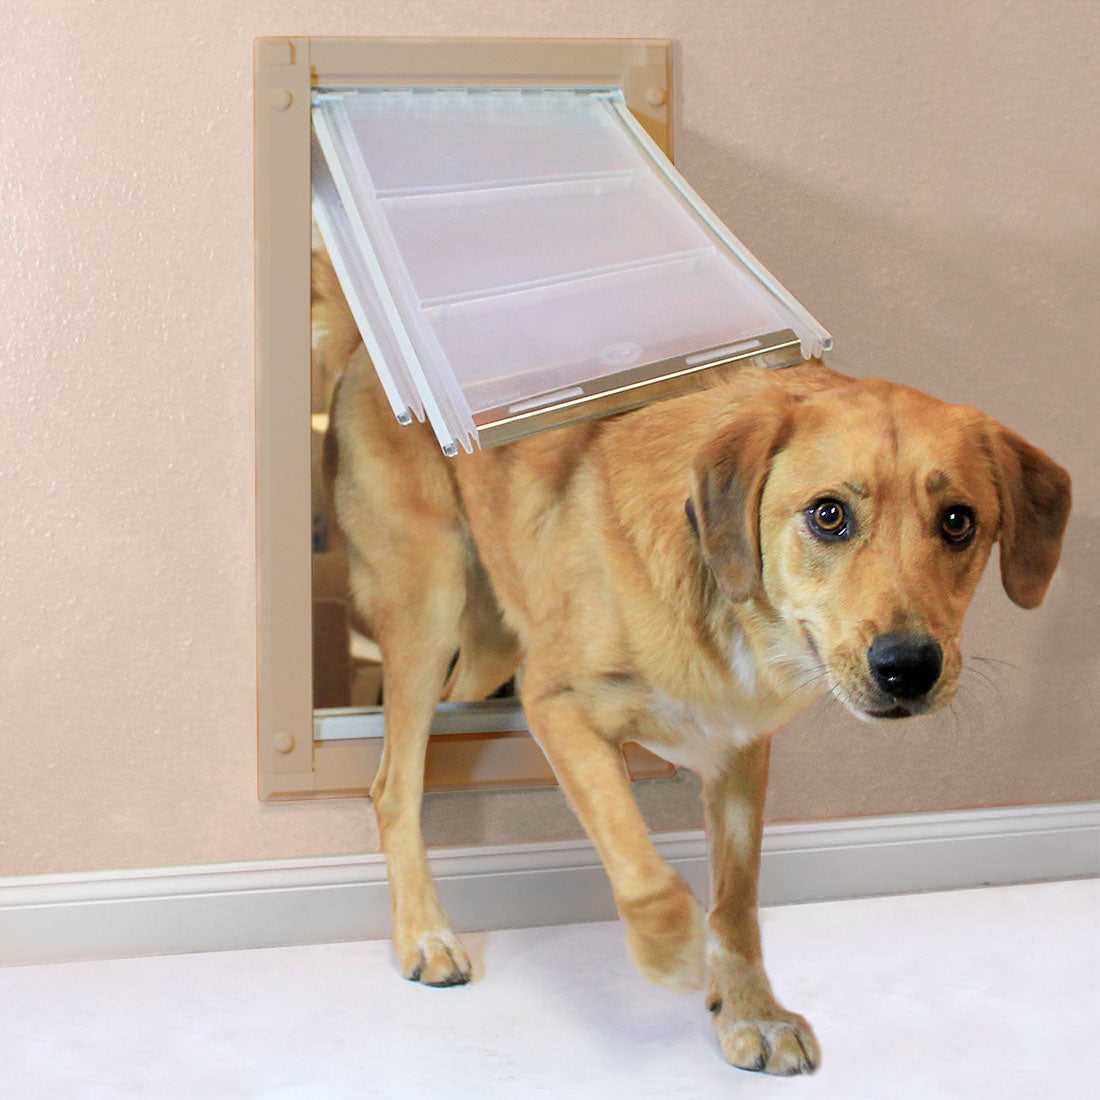
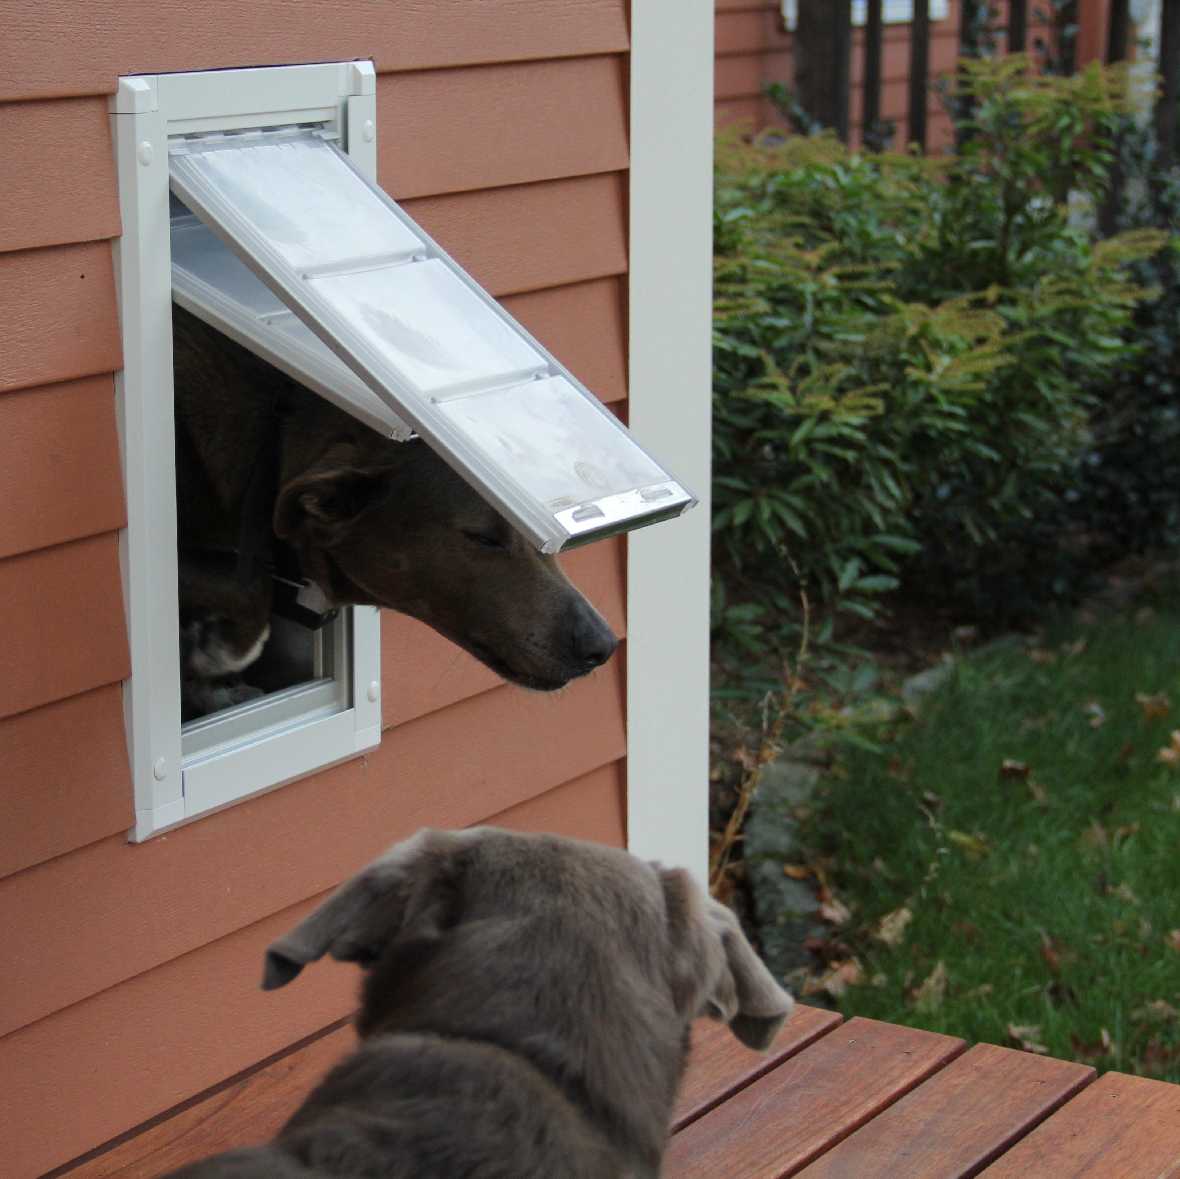
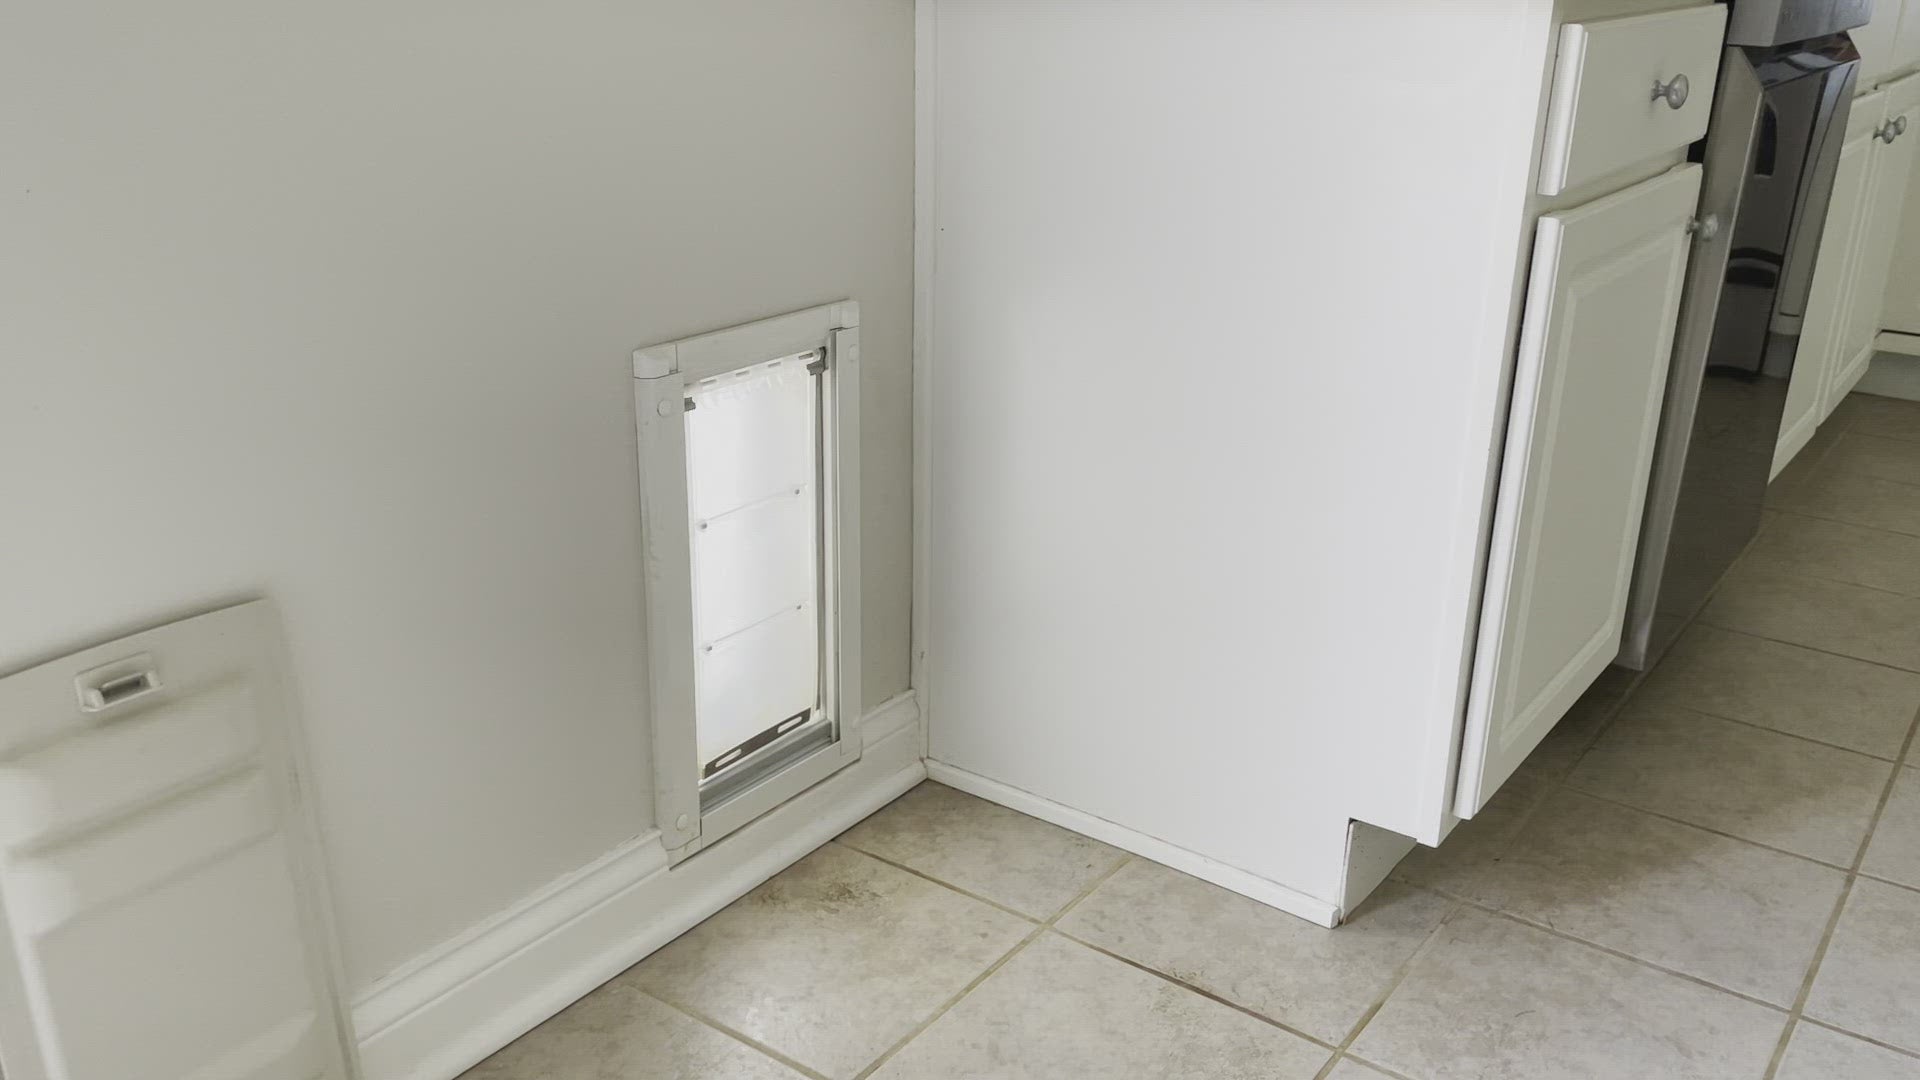
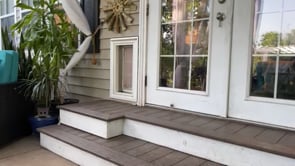
Endura Flap Original Dog Doors for Walls


- Installs in walls 2" - 8" thick (up to 8 1/4" for Single Flap models and up to 8 3/4" for Double Flap Models)
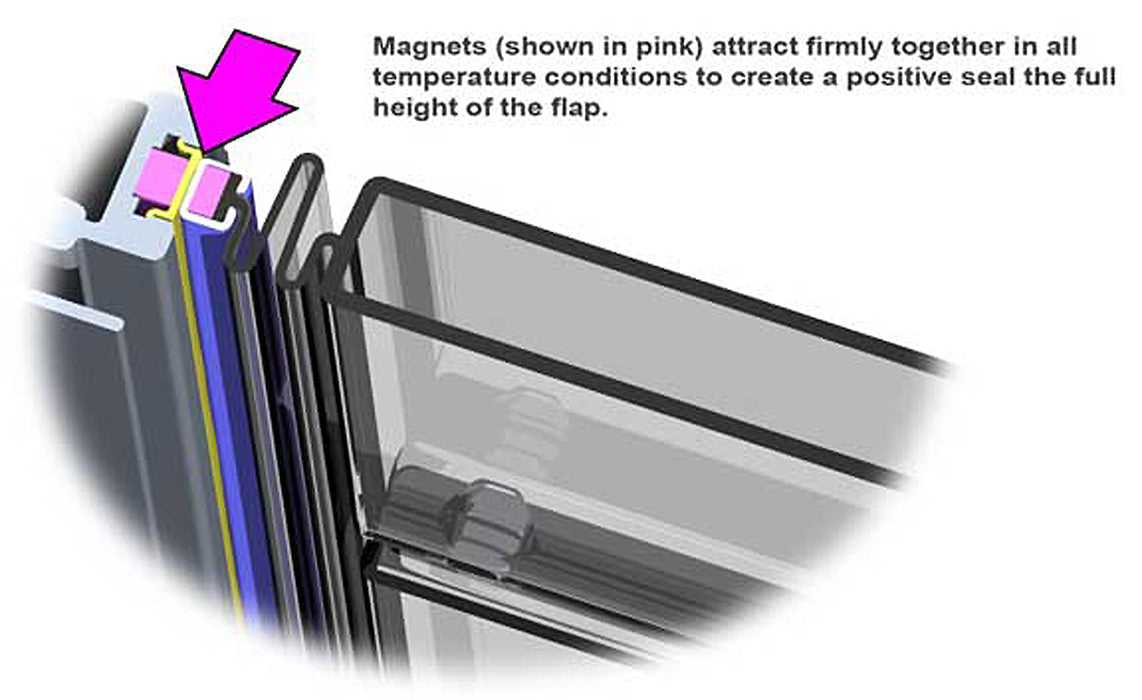
- Magnets along three sides of the flap for improved wind resistance
- Flaps resist 50 mph winds and endures -40 degree temperatures
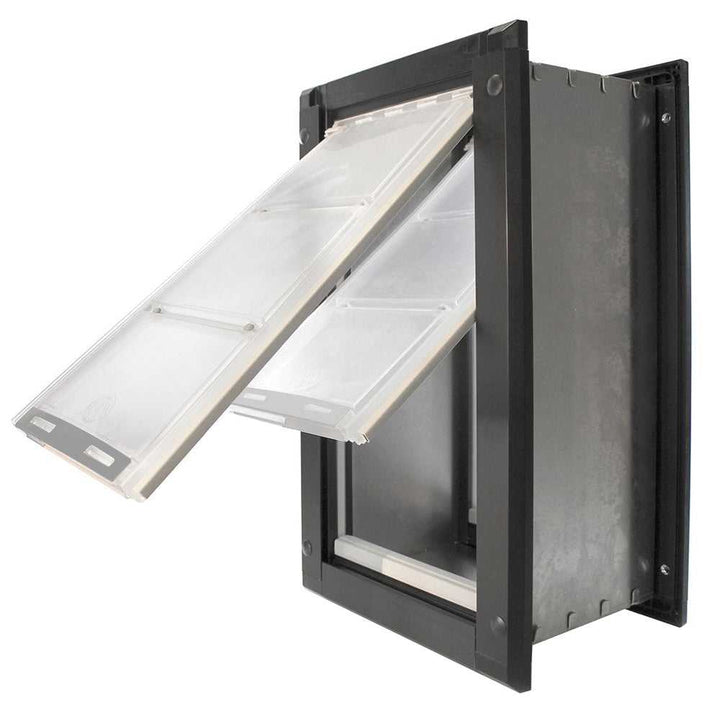
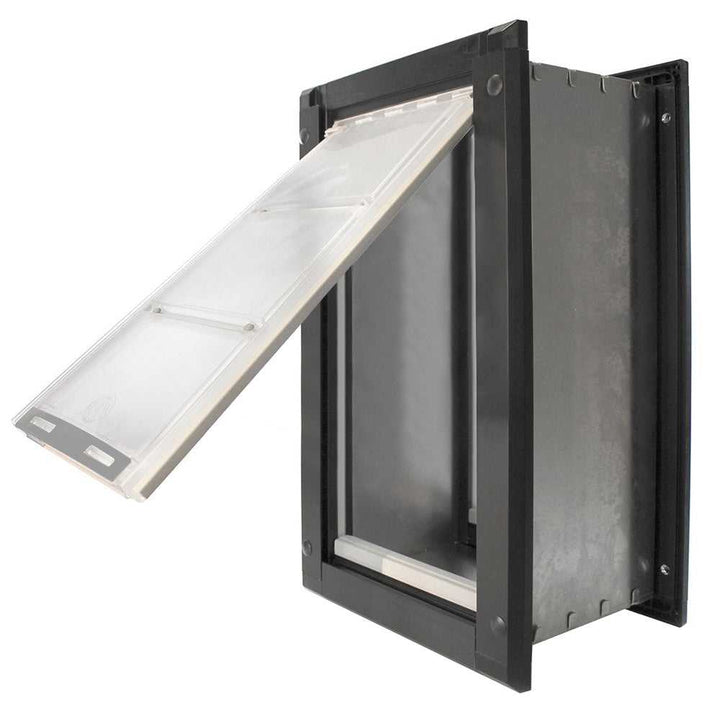
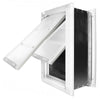
- Option of Two Flaps for most insulation or One insulation Flap on inside frame
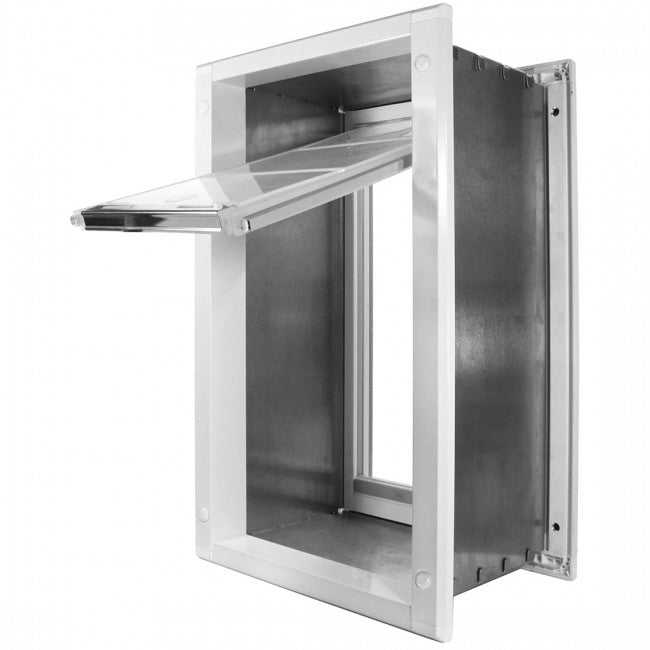
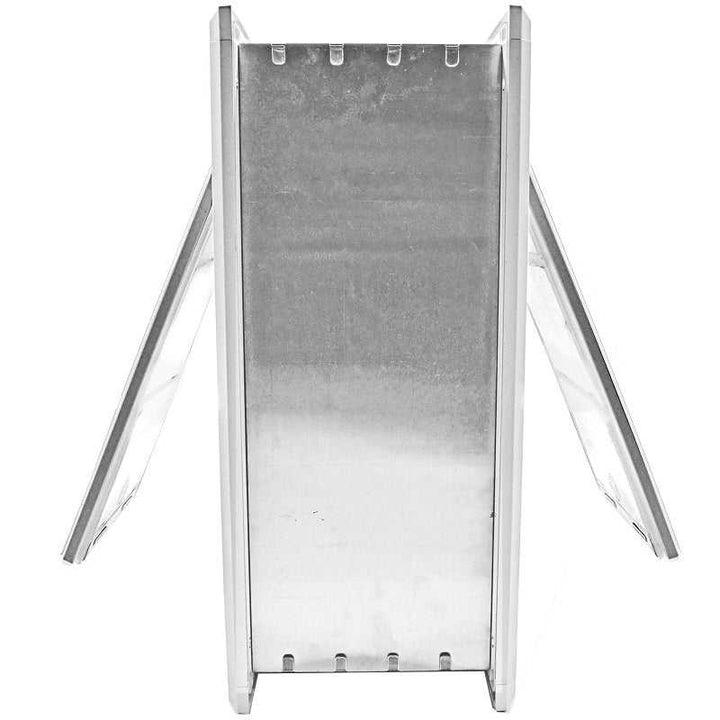
- Durable, long-lasting, aluminum tunnel and aluminum frames
-
Endura Flap Original Dog Doors for Walls are final sale and non-refundable
 Product Details
Product Details
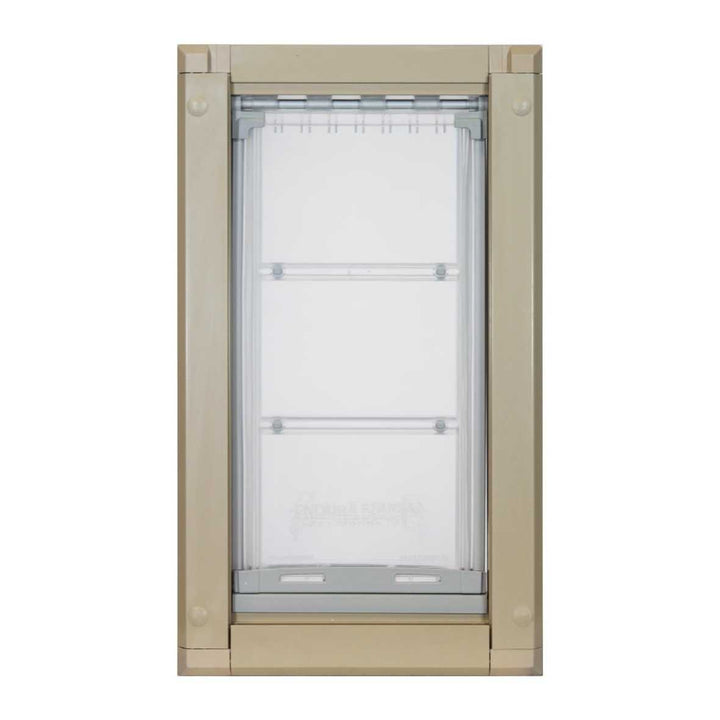
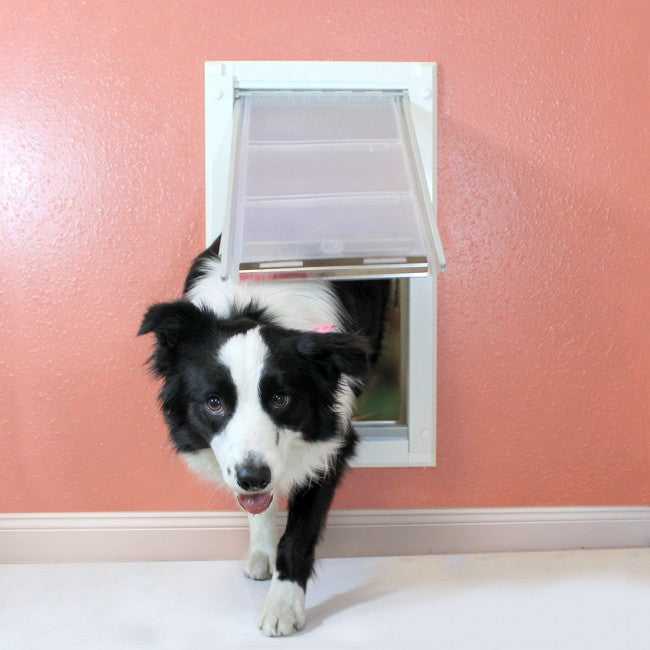
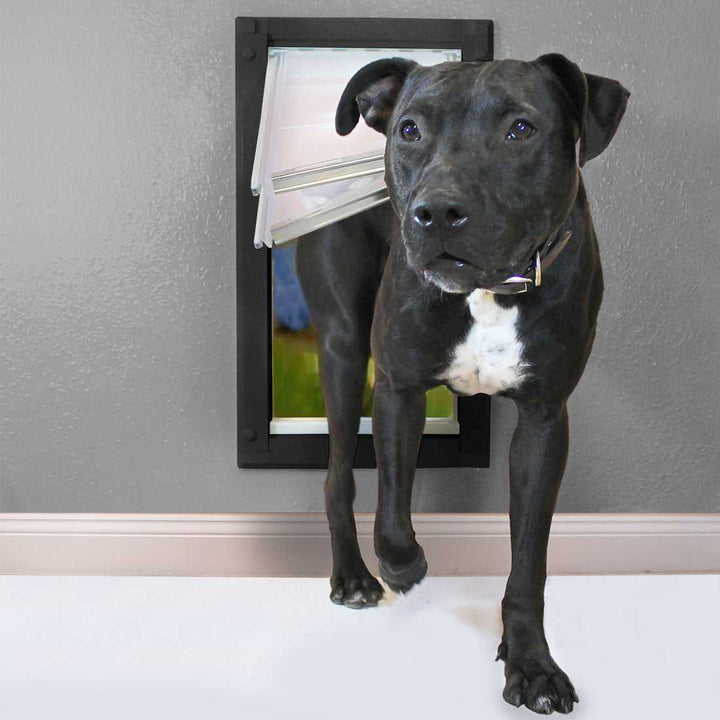
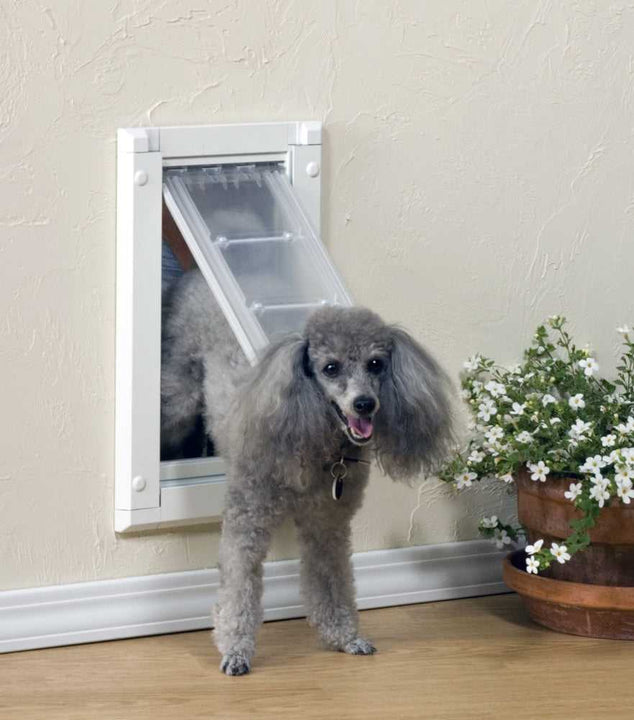
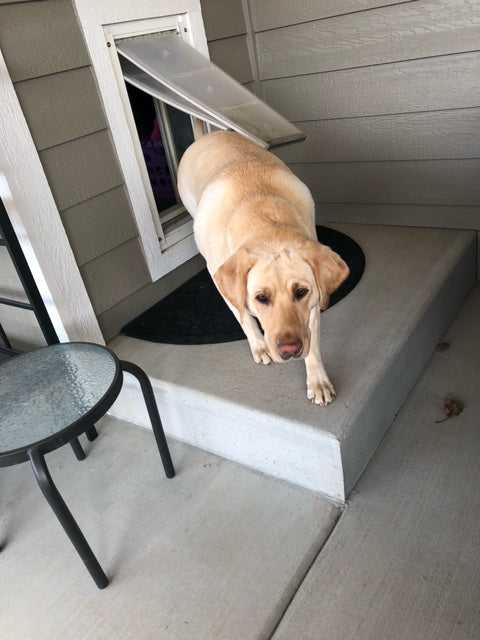
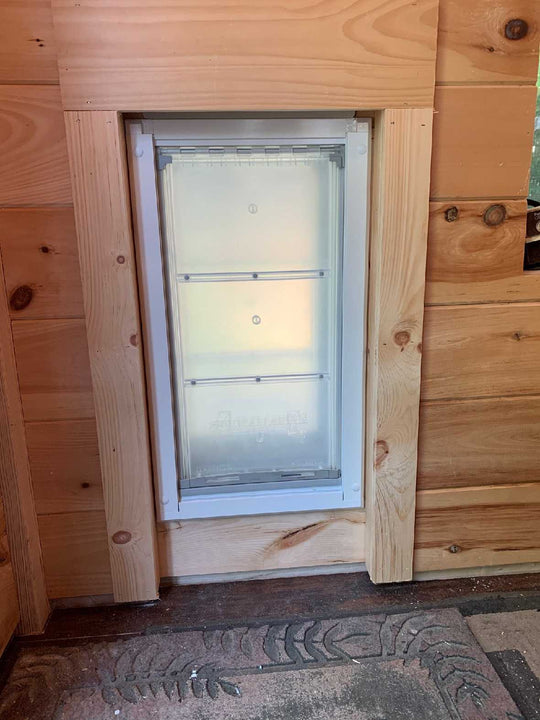
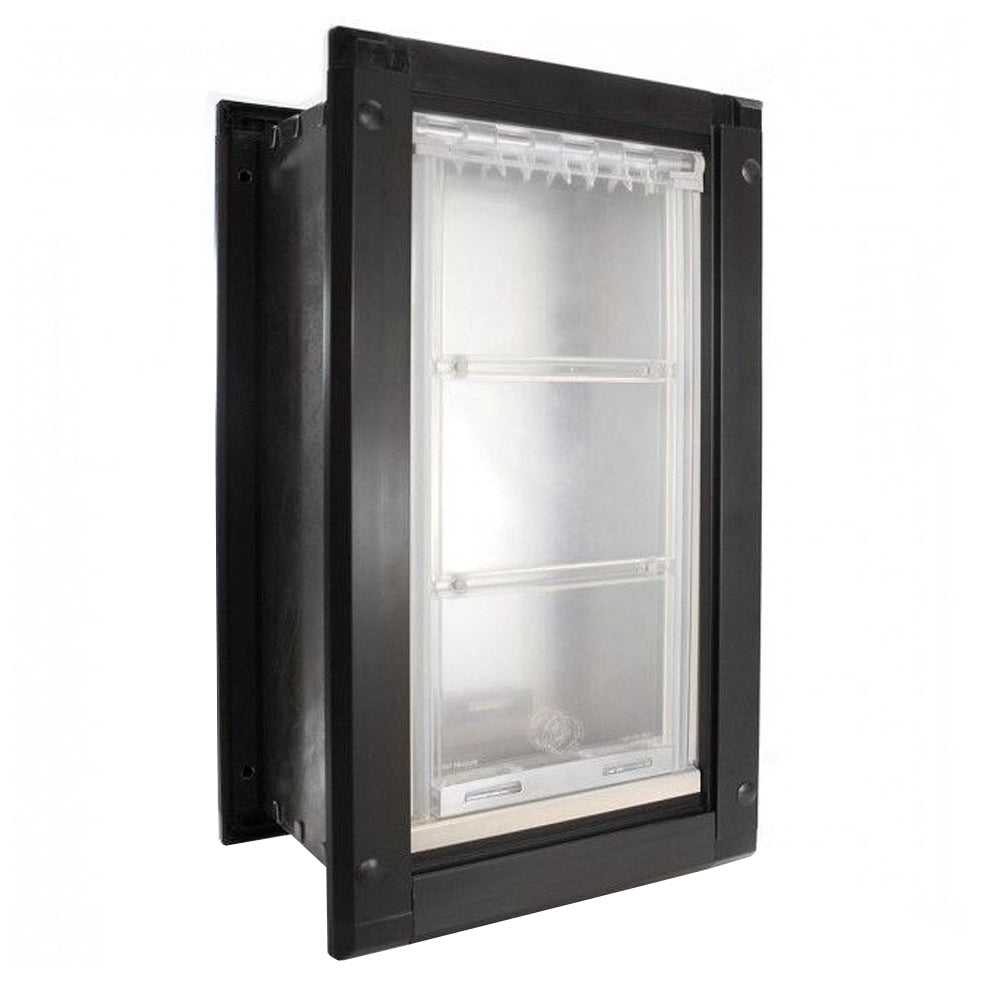
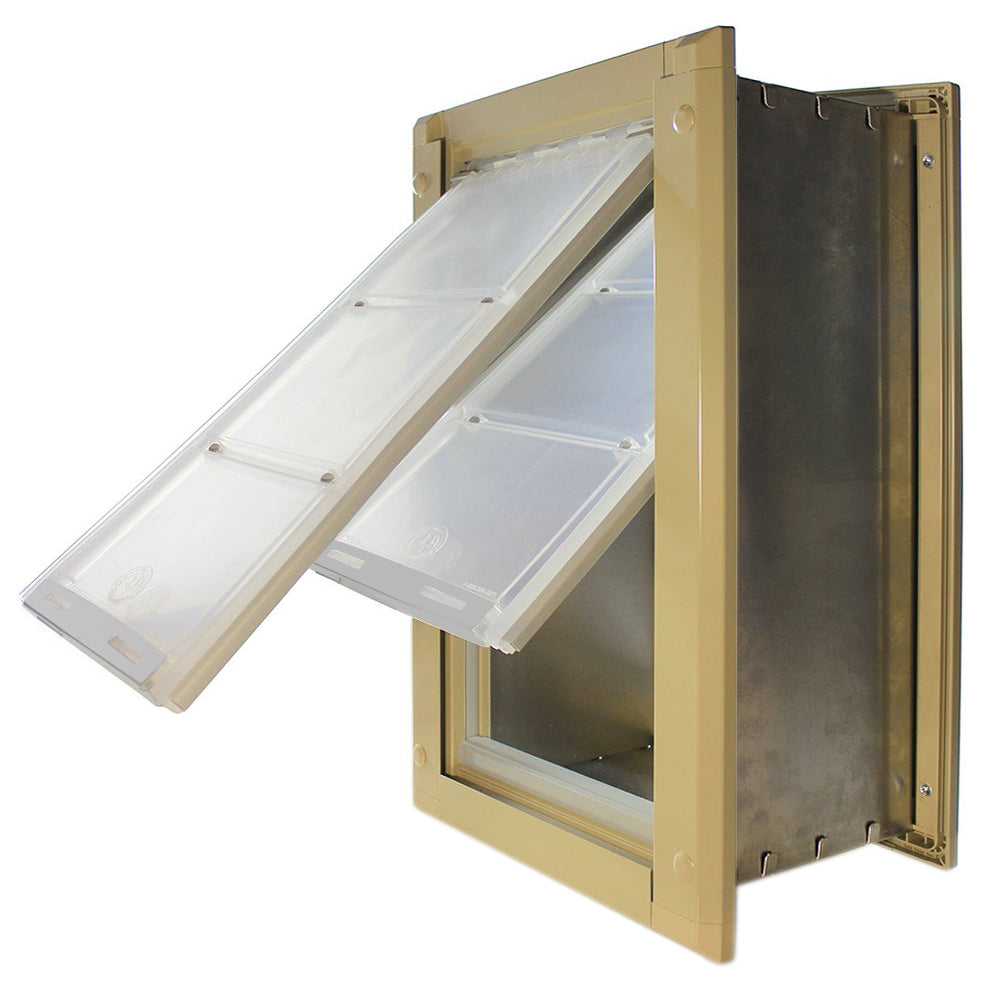
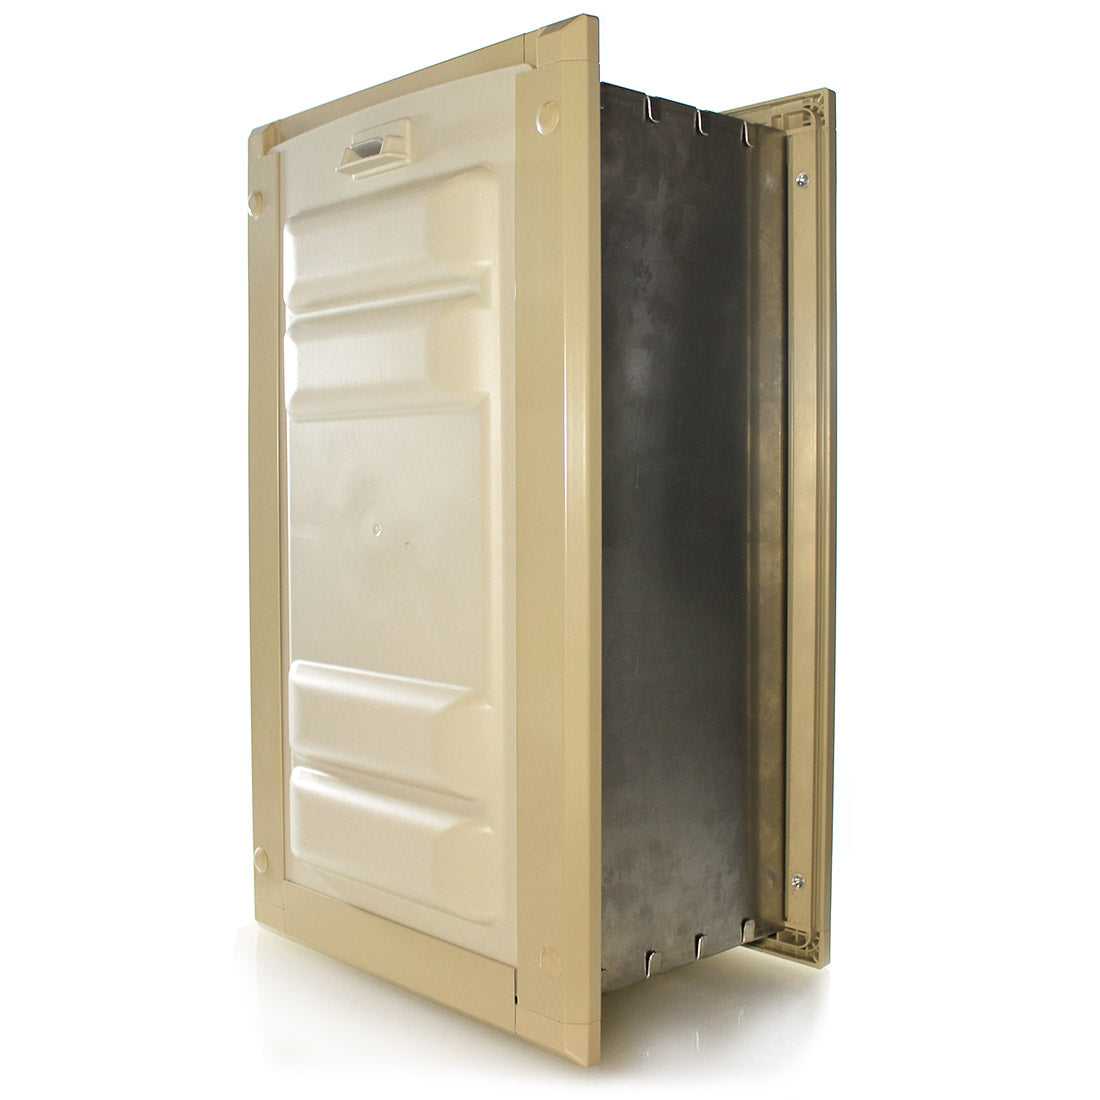
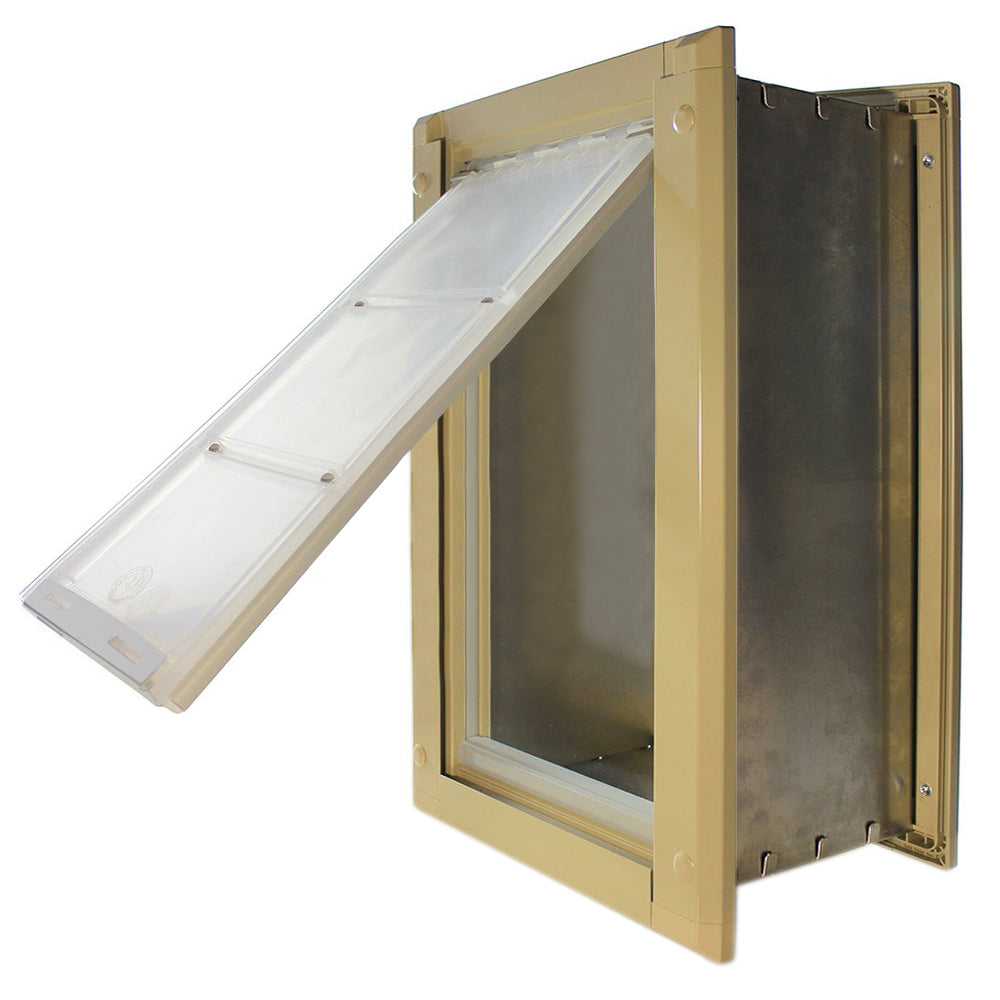
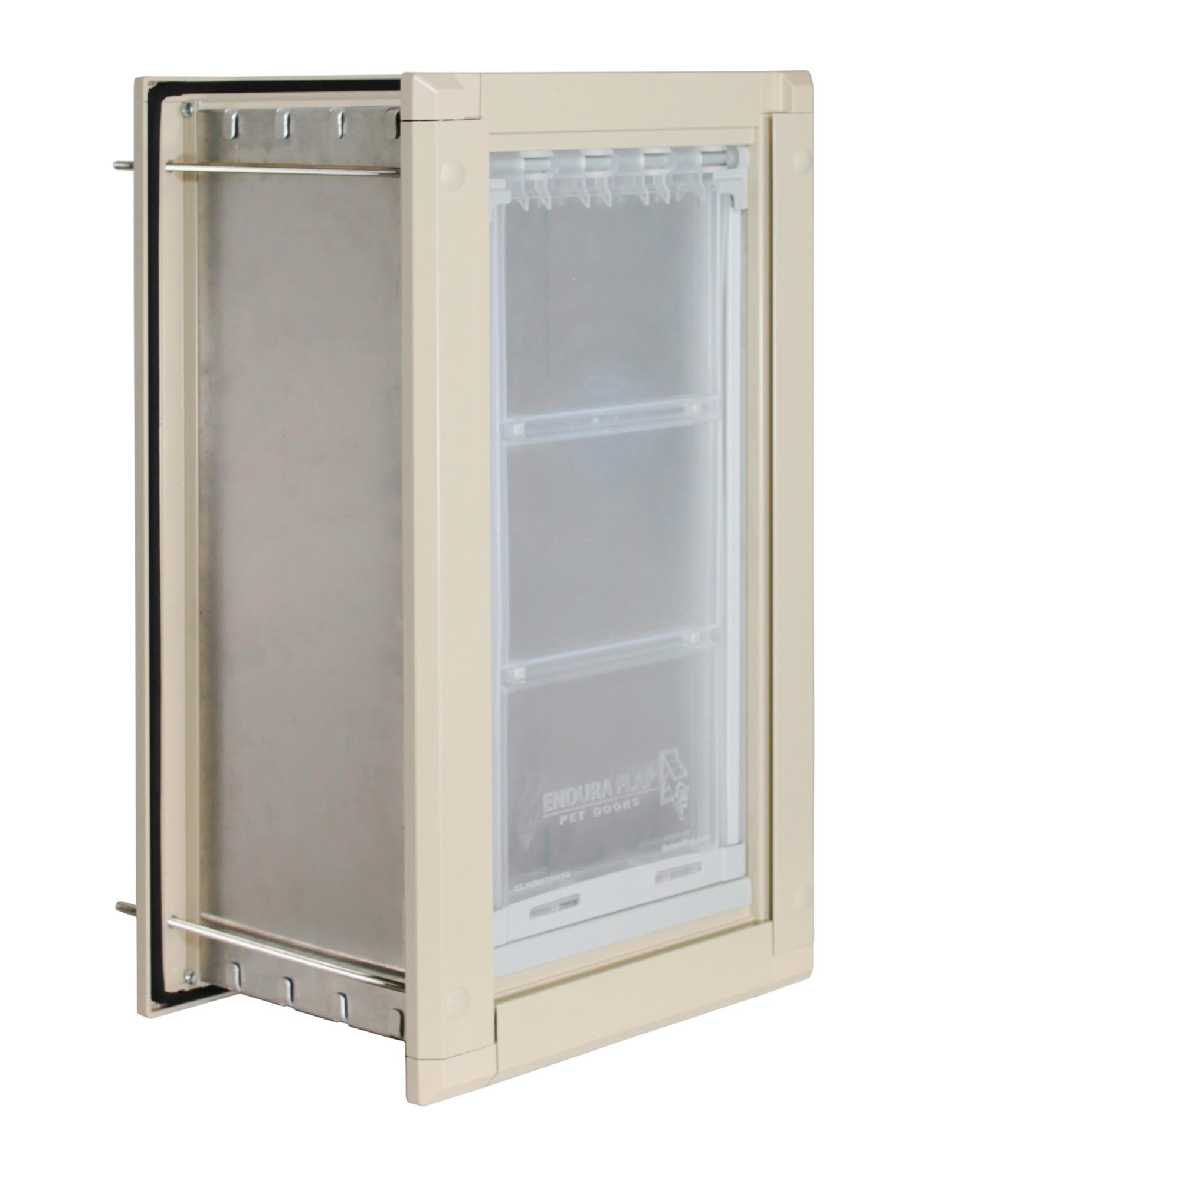
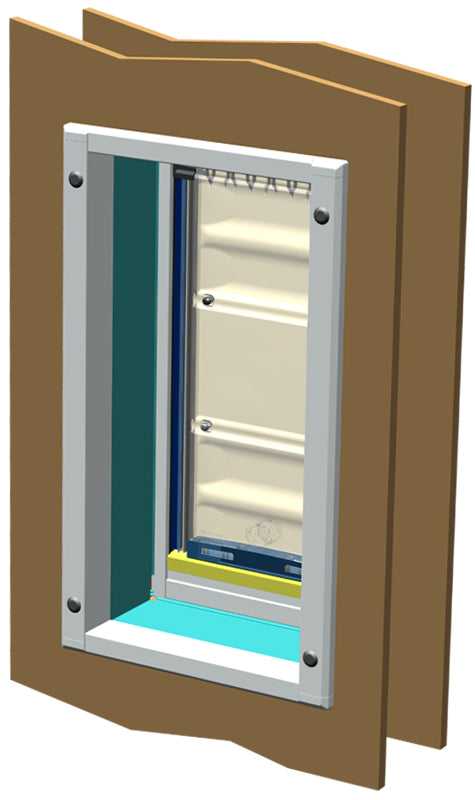
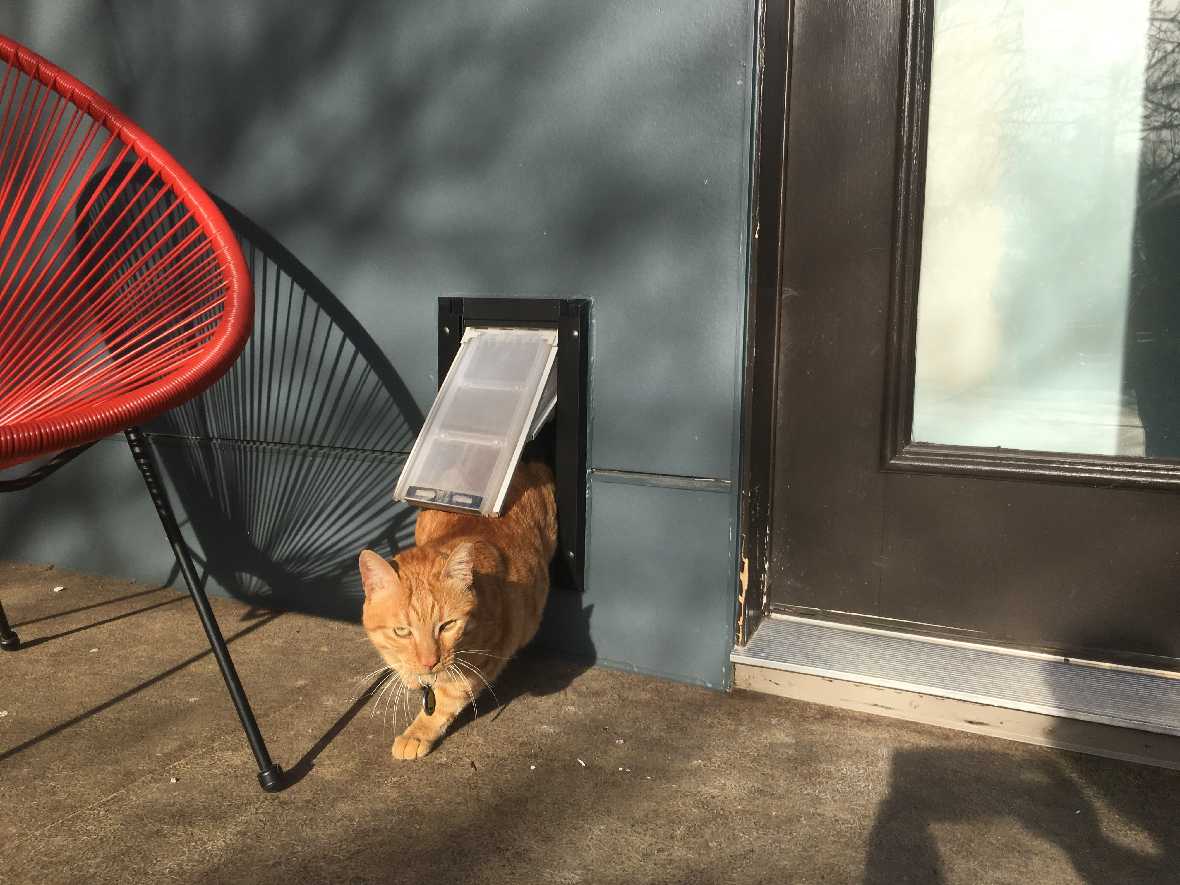
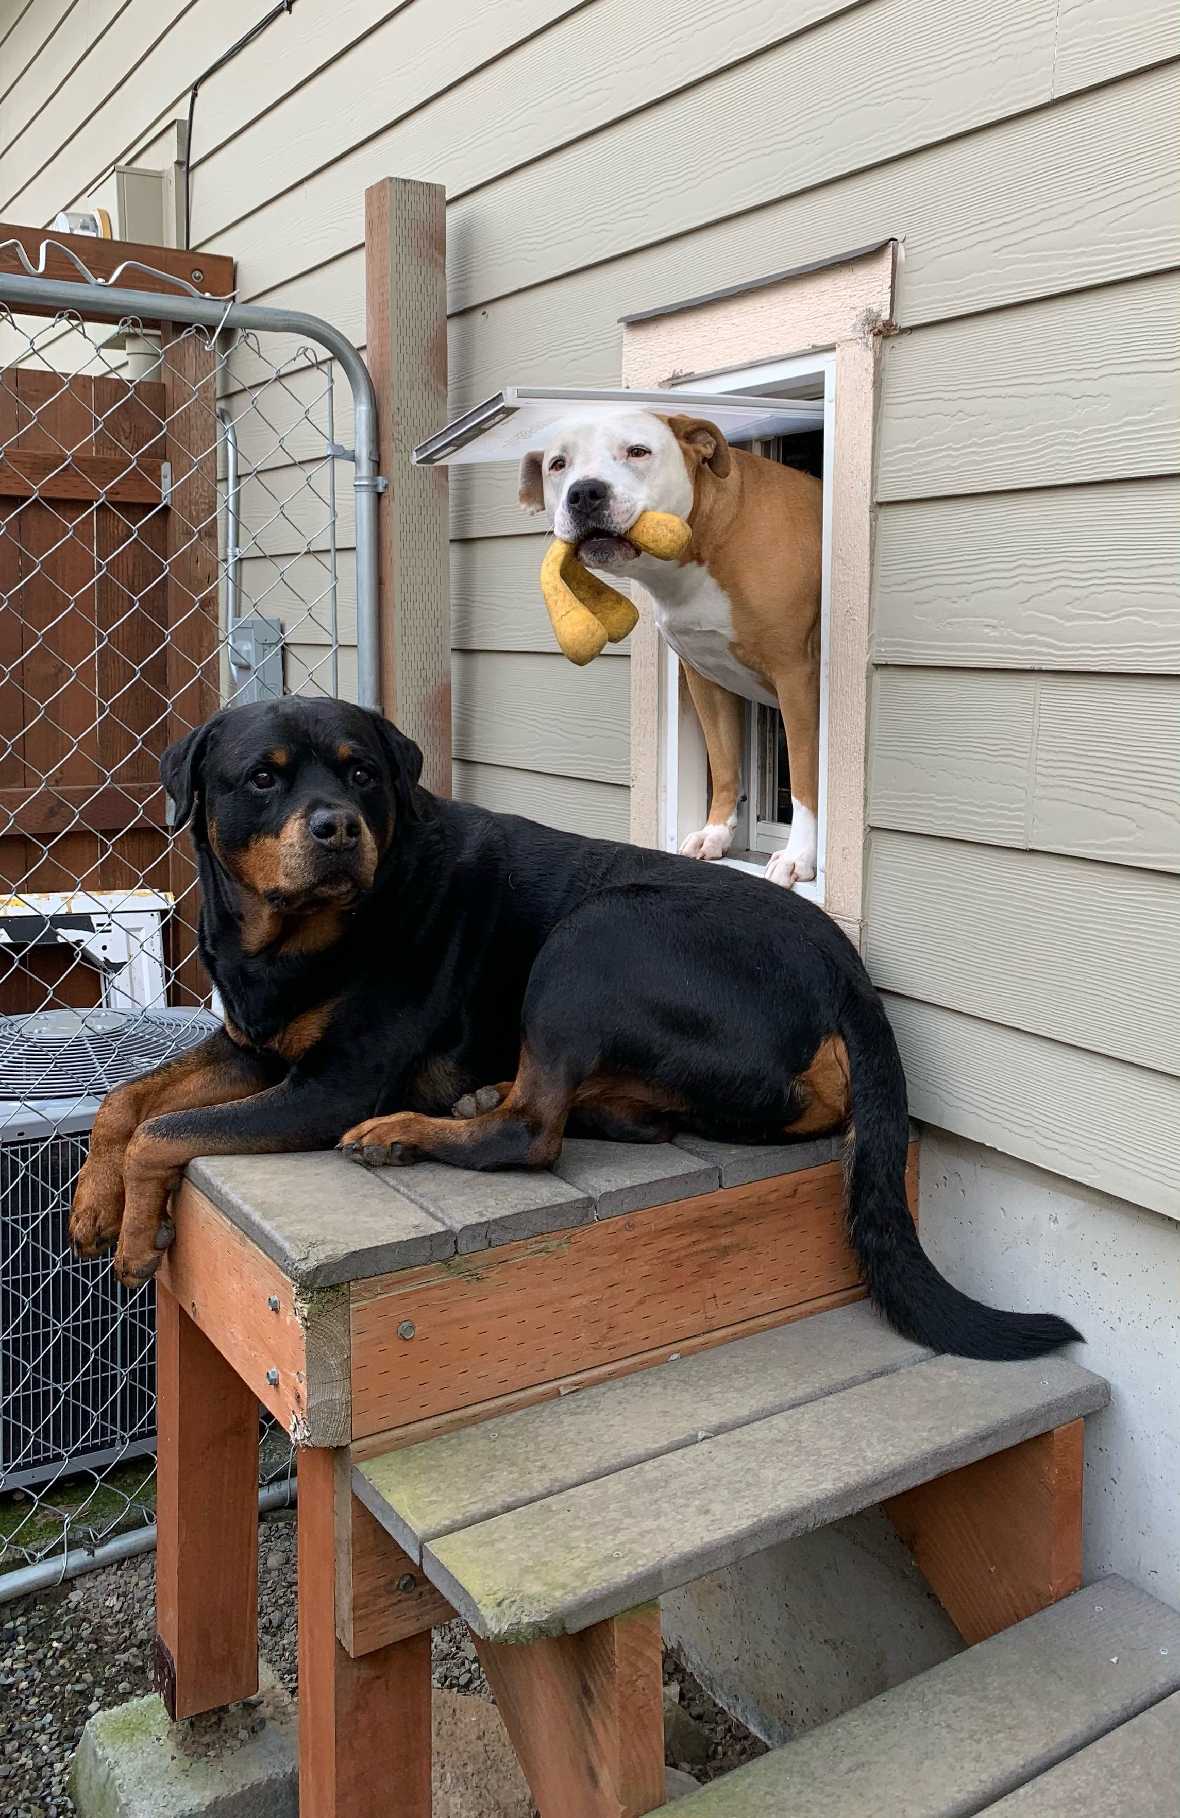
The Endura Flap Dog Door for Walls is designed with an aluminum frames and tunnel for walls 2" - 8 1/4" thick for Single Flap models and 2" - 8 3/4" thick for Double Flap Models. The Endura Flap is the best pet door for extreme weather, manufactured with environmentally friendly, high insulation value polyolefin polymer flap material to save energy and insulate your home. With the ability to combat 50mph winds and -40 degrees Fahrenheit temperatures, you'll no longer have to worry about energy loss or temperature fluctuation inside your home. If you live in an area with a severe climate, we recommend choosing the double flaps. Say goodbye to hot and cold weather problems with this supreme dog door that's built to last.
Features:
- Small-Extra Large dual flaps or single flap models available
- Heavy-duty, self-framing aluminum frame provides extreme strength and durability
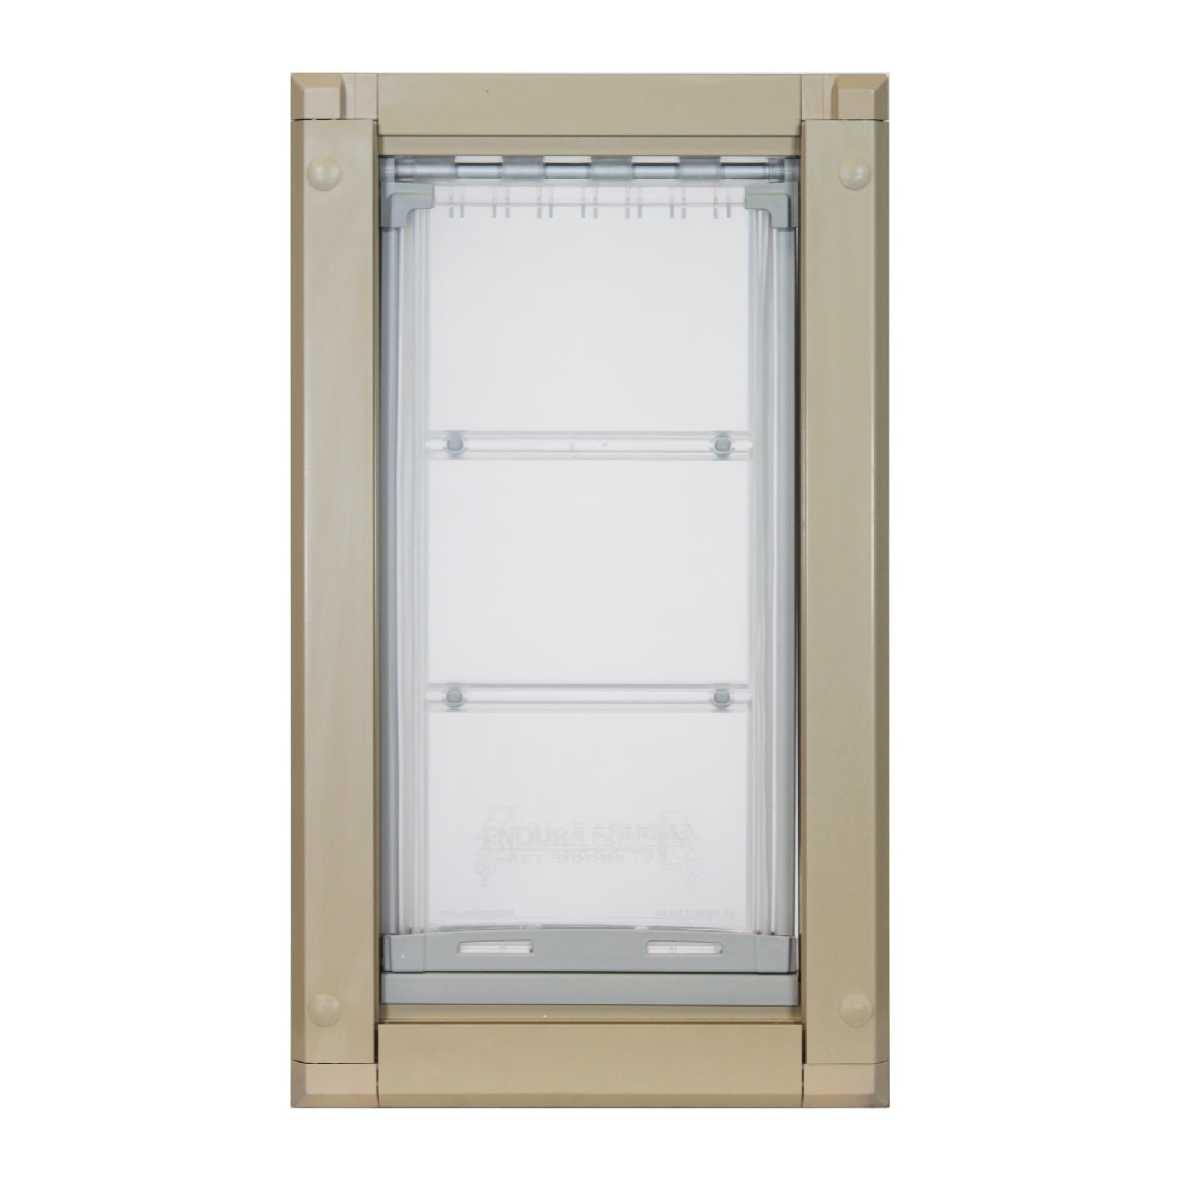
- Frame color available in white, black, or tan
- A taller and slimmer door allows more pets to use it
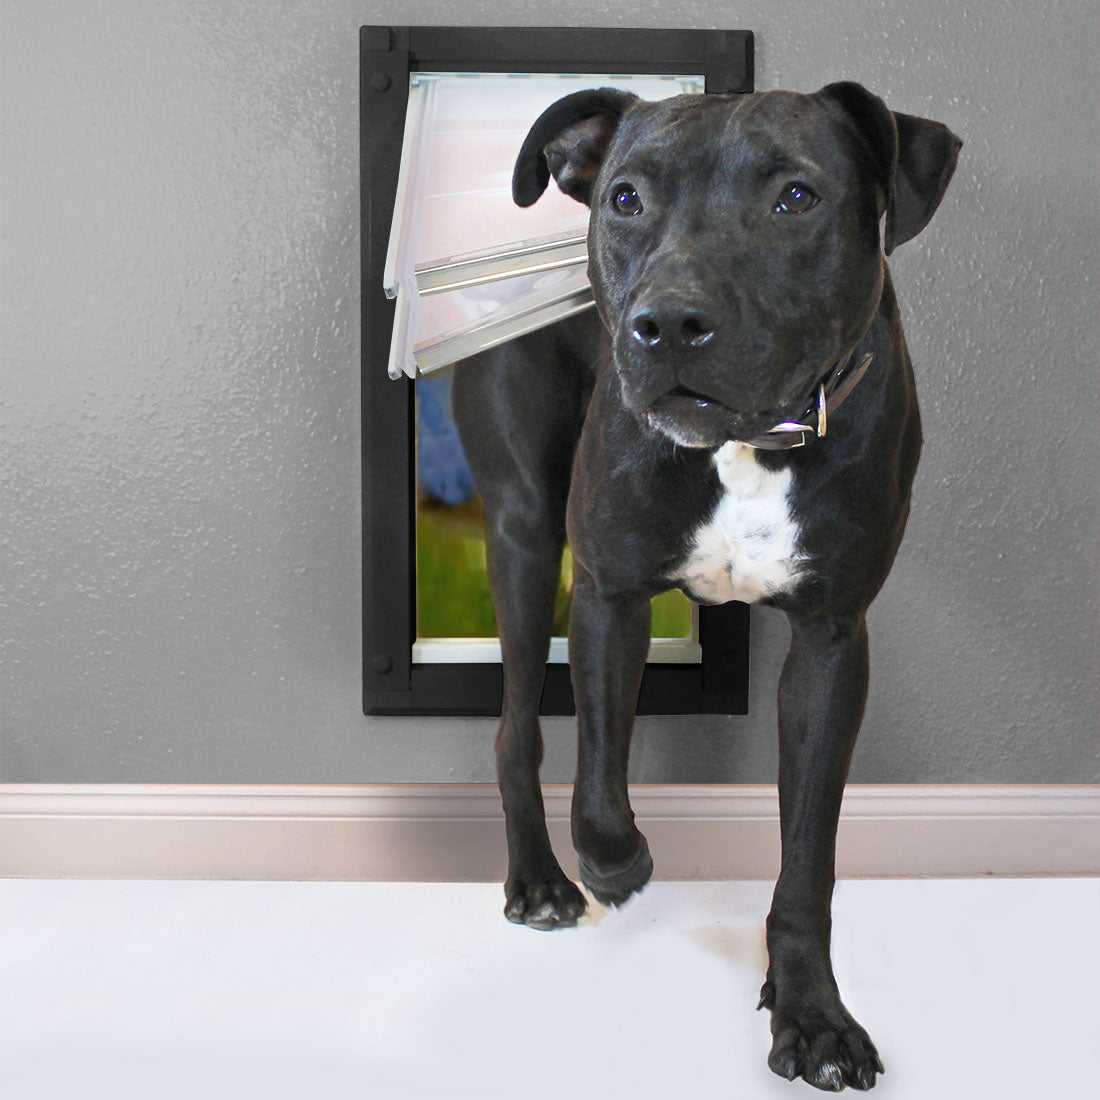
- The flexible flap is usable even in temperatures as low as -40 degrees Fahrenheit
- Magnetic lining ensures that the flap won't blow up in heavy winds
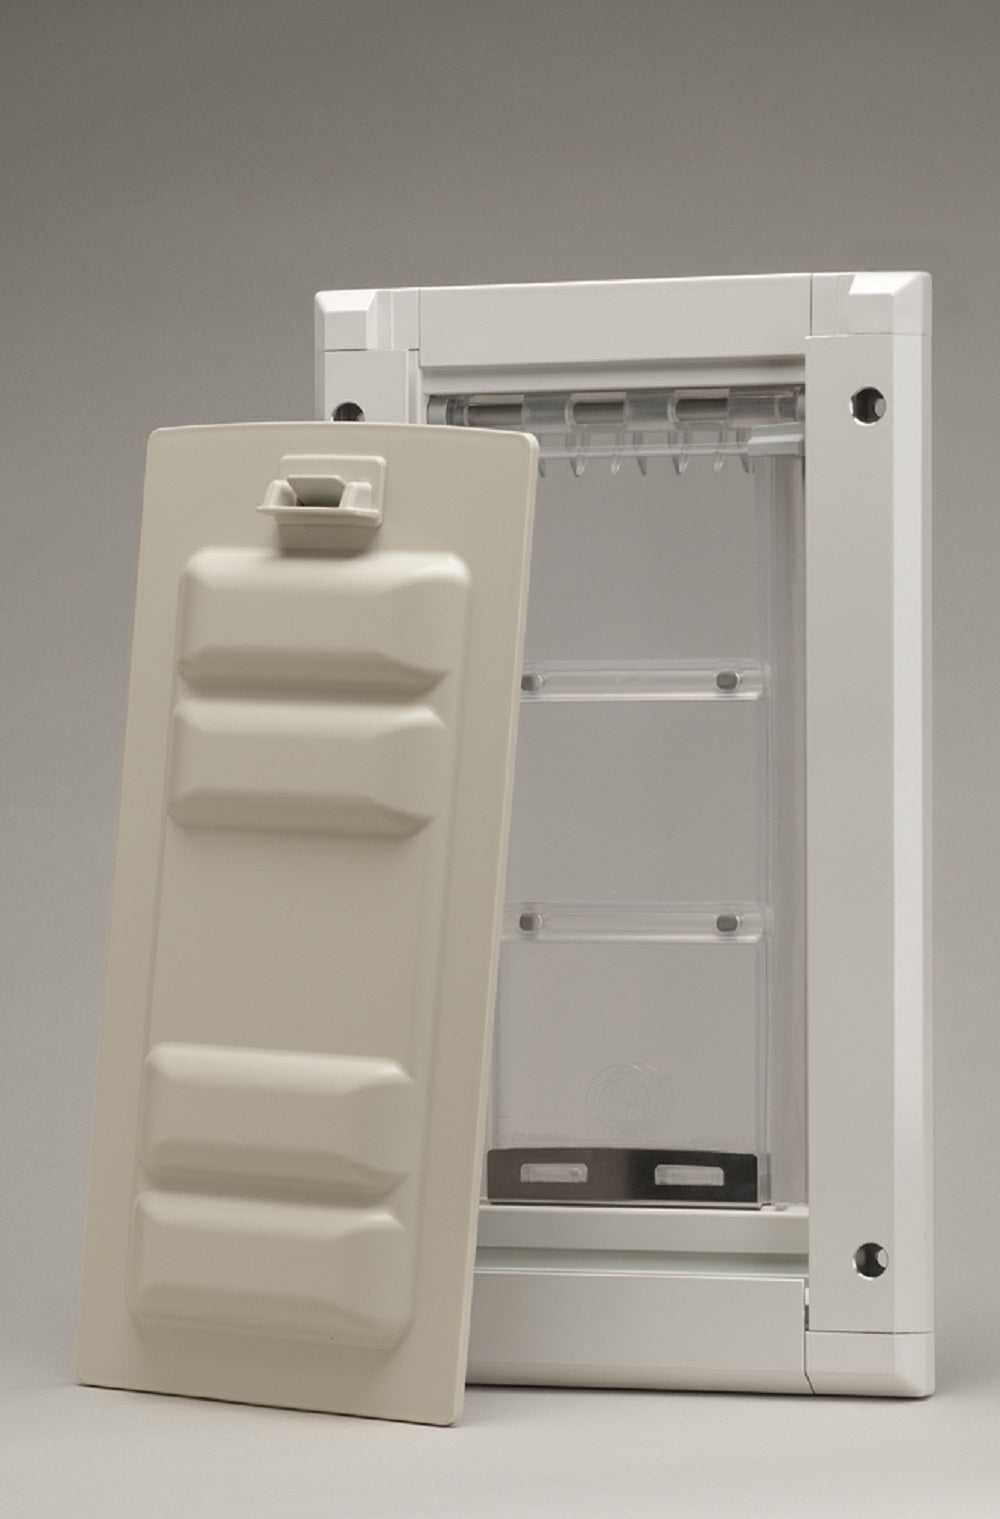
- Durable locking cover is included and secures flap when needed
- 90-day return policy and a lifetime warranty
Benefits:
- Frame aesthetics are meant to go well with your house
- Flaps are easy to clean with soap and water or non-harsh cleaners
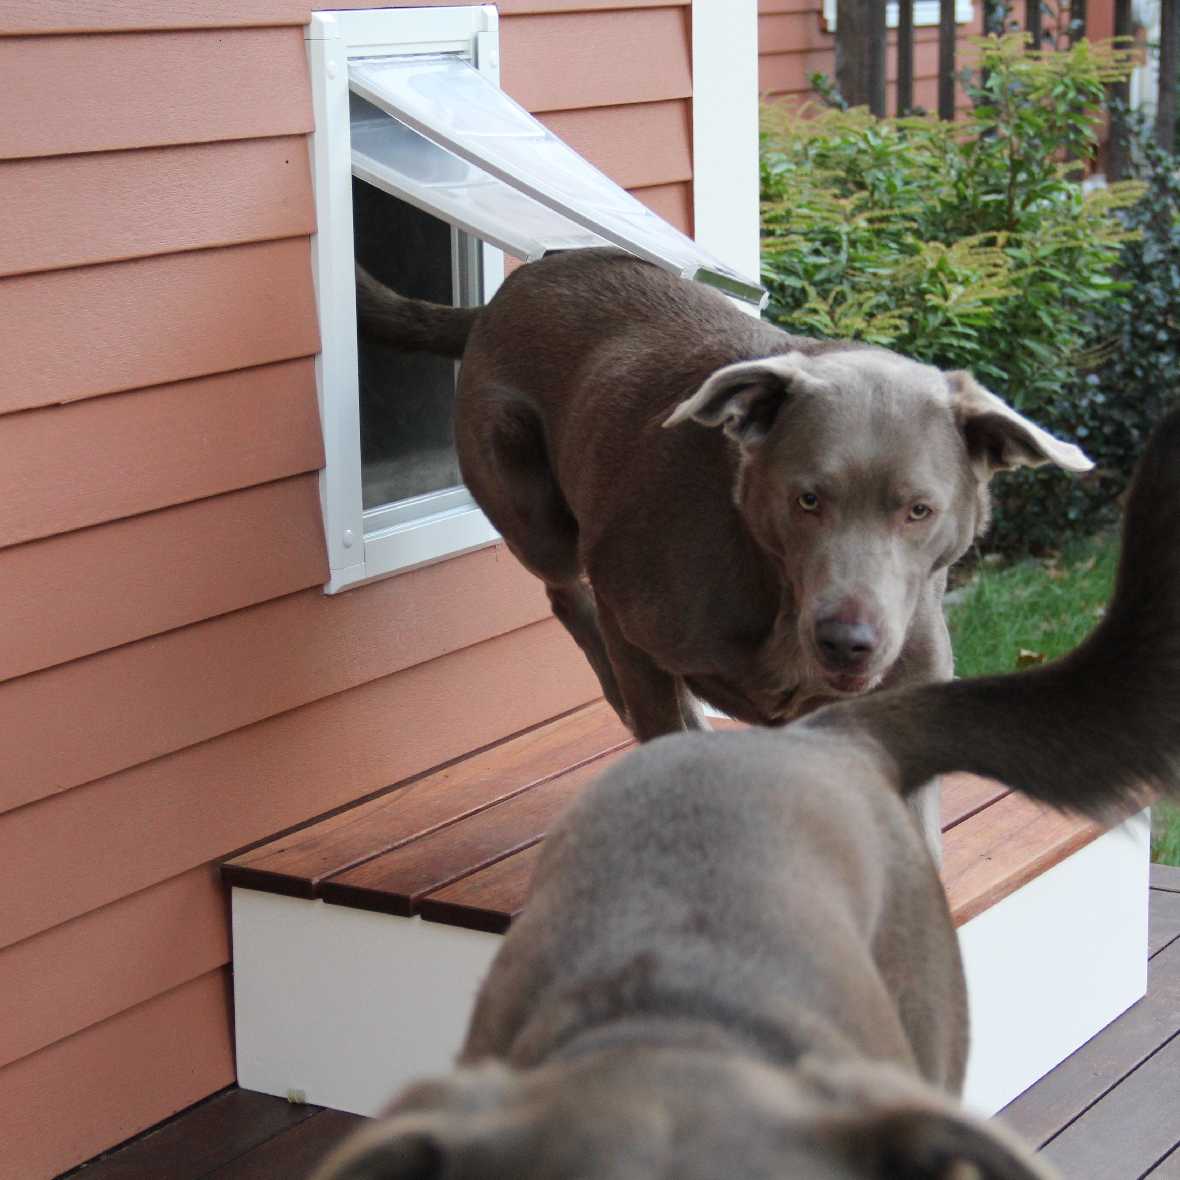
- Holds up for active dogs that run through the door at full speed
- Provided videos under the Videos and Installation Instructions tabs help with easy installation
- Lets your pets come and go whenever they see fit
- Made in the USA


Size Chart
- Small Single Flap: 6"w x 11"h Double Flap:6"w x 10"h
- Medium Single Flap: 8"w x 15"h Double Flap: 8"w x 14"h
- Large Single Flap: 10"w x 19"h Double Flap: 10"w x 18"h
- Extra Large Single Flap: 12"w x 23"h Double Flap: 12"w x 22"h
Flap Dimensions:
Single Flap:6"w x 11"h
Double Flap:6"w x 10"h
The entry way your dog goes through.Outside Frame Dimensions
9 7/16"w x 16"h
The outer edge of the pet door.


Rough Cut Out:
8 5/8"w x 15"h
The size of the hole needed to fit your pet door into your wall.Flap Dimensions:
Single Flap:8"w x 15"h
Double Flap:8"w x 14"h
The entry way your dog goes through.Outside Frame Dimensions
11 1/2"w x 20"h
The outer edge of the pet door.


Rough Cut Out:
10 5/8"w x 19 1/8"h
The size of the hole needed to fit your pet door into your wall.Flap Dimensions:
Single Flap:10"w x 19"h
Double Flap:10"w x 18"h
The entry way your dog goes through.Outside Frame Dimensions
13 9/16"w x 24"h
The outer edge of the pet door.


Rough Cut Out:
12 5/8"w x 23 1/6"h
The size of the hole needed to fit your pet door into your wall.Flap Dimensions:
Single Flap:12"w x 23"h
Double Flap:12"w x 22"h
The entry way your dog goes through.Outside Frame Dimensions
15 5/8"w x 28"h
The outer edge of the pet door.


Rough Cut Out:
14 11/16"w x 27 1/8"h
The size of the hole needed to fit your pet door into your wall.| Flap Size | Flap Dimension | Rough Cut Out | Outside Frame Dimension | Recommended Pet Height |
|---|---|---|---|---|
| Small | (Single) 6" w x 11" h | 8 5⁄8" w x 15" h | 9 7⁄16" w x 16" h | 9" - 16" |
| (Double) 6" w x 10" h | 8" - 14" | |||
| Medium | (Single) 8" w x 15" h | 10 5⁄8" w x 19 1⁄8" h | 11 1⁄2" w x 20" h | 9" - 22" |
| (Double) 8" w x 14" h | 8" - 21" | |||
| Large | (Single) 10" w x 19" h | 12 5⁄8" w x 23 1⁄16" h | 13 9⁄16" w x 24" | 9" - 28" |
| (Double) 10" w x 18" h | 8" - 27" | |||
| Extra Large | (Single) 12" w x 23" h | 14 11⁄16" w x 27 1⁄8" | 15 5⁄8" w x 28" h | 9" - 36" |
| (Double) 12" w x 22" h | 8" - 34" |
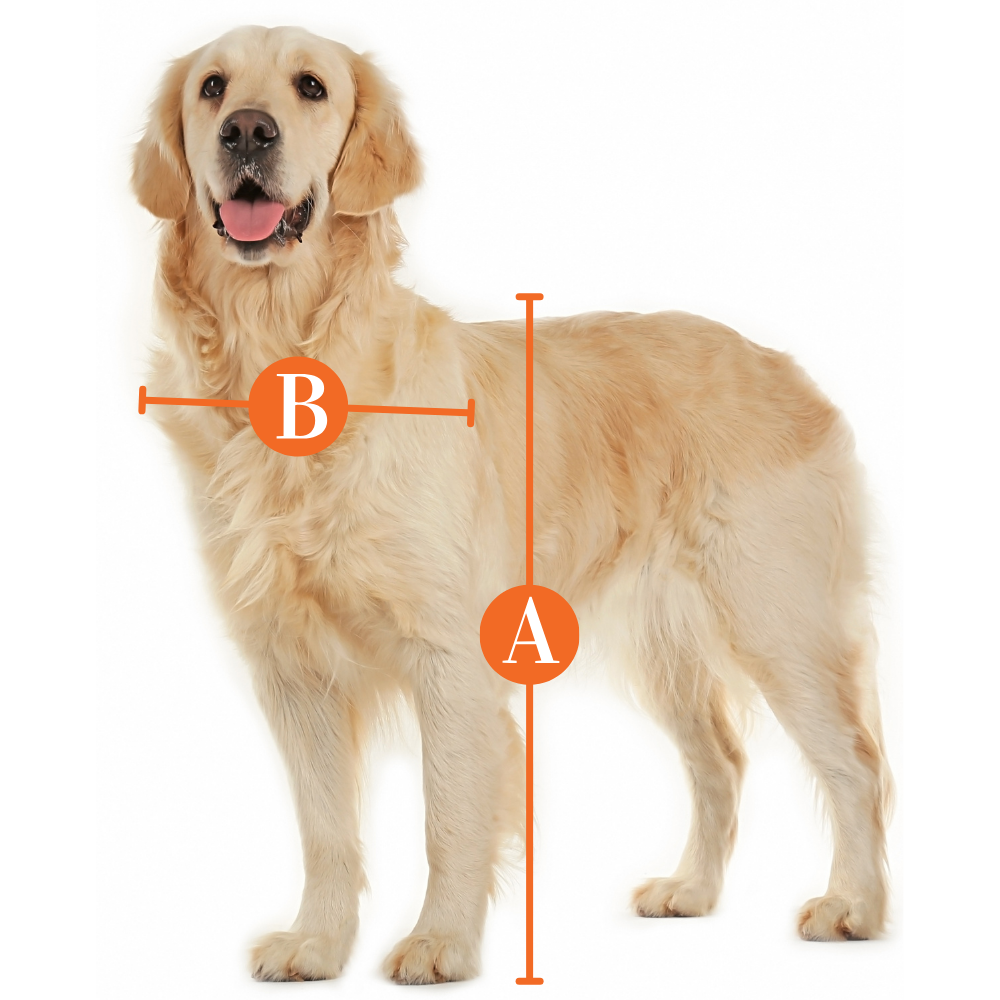
Do not know which size to get? Here is a measurement guide to help you out
Number of Flaps:
- 1 - Single Flap: On inside of wall (same side as locking cover)
- 2 - Double Flap: One on each side. The included dead-air-space and extra flap add significantly to the already considerable insulation and sealing values.
Installation Instructions
 Difficulty
High
Difficulty
High
 Steps
14
Steps
14
 Time Required
2-3 hours
Time Required
2-3 hours
 Sections
06
Sections
06
 Flags
03
Flags
03
Parts (Single Flap Model)
- 1 Installation Template
- 8 Hole Plugs
- 1 Interior Frame (with flap)
- 1 Exterior Frame (no flap)
- 1 Locking Cover
- 4 Tunnel Pieces
- 4 Threaded Rods
- 1 Tube of Silicone
- 1 Jigsaw Blade
Tools
- Pencil
- Level
- Drill with 3/8" (9,5 mm) drill bit
- Jigsaw or Reciprocating Saw
- Phillips head screwdriver
- Measuring Tape
- Rubber Mallet (or hammer and block of wood
- Safety gear, mask, gloves & clamps recommended
Please read instructions & notes thoroughly before installation.
Single Flap Wall Mount
Step 1 Measure your Pet

- Tape the provided template onto the wall in the desired location. Use a level to straighten the edges of the template.
Step 2 Check Wall For Wires/Pipes

- Mark the centers of the four holes using a pencil or nail. Remove the template
- Drill a small hole in the middle to peek into the wall to check for wires/pipes. If you’re clear, move on to the next step to drill through the marked holes.
Step 3 Drill Holes & Rough Cutout

- Drill the marked 3⁄8” (9,5 mm) holes through the interior and exterior walls
- Now, cut the opening out along the lines
Step 4 Check Weather-Stripping

Step 5 Assemble Tunnel


- Trim the four sheet metal tunnel pieces so that they are 1⁄4“ (0.6 cm) shorter than the thickness of the wall. We recommend using a jigsaw, but you could use other metal cutting tools instead
Step 6 Bend Tunnel Tabs

- Bend the frame attachment tabs on the two smaller tunnel pieces 90 degrees upward along the perforations
Step 7 Attach Small Tunnel Pieces

- Remove the two screws at the top and two screws at the bottom of the Interior Flap Frame. If you removed the cover already, the OUTSIDE frame screw holes have threaded nuts in them and you can see them shine.
- Attach the smaller tunnel pieces to the top and bottom of the Interior Flap Frame using the two screws
Step 8 Attach Larger Tunnel Pieces

- Slide the larger tunnel pieces onto the finger tabs on the small top and bottom tunnel pieces. Bend the finger tabs down as shown
Step 9 Apply Silicone to Tunnel

- Apply a bead of the provided silicone sealant along the inside of the tunnel where it mates with the interior frame, and along the tunnel seams
Step 10 Position Interior Frame & Tunnel

- Place the Interior Frame, with the tunnel attached, into the opening in the wall from the inside of the building. Place the Exterior Frame into the tunnel.
Step 11 Attach Exterior Frame


- Insert the threaded rods with the barrel nuts into the four holes in the Interior Frame (the frame that has a locking cover), and screw the threaded rods into the Exterior Frame finger tight
Step 12 Remove Excess Threaded Rod

- With the pet door leveled and all four threaded rods tightened, wiggle the end of the threaded rods that are protruding out of the exterior frame until the ends snap off
Step 13 Seal with Silicone

- Apply a bead of silicone sealant along the inside of the tunnel where it mates with the exterior frame
- In addition to sealing inside the tunnel of the pet door we recommend that you also seal the outside frame around the pet door
Step 14 Insert Hole Plugs

- Tap the hole plugs into the Interior and Exterior Frames
Difficulty
High
Steps
14
Time Required
2-3 hours
Sections
06
Flags
03
Parts (Double Flap Model)
- 1 Installation Template
- 8 Hole Plugs
- 1 Interior Frame with Flap
- 1 Exterior Frame with Flap
- 1 Locking Cover
- 4 Tunnel Pieces
- 4 Threaded Rods
- 1 Tube of Silicone
- 1 Jigsaw Blade
Tools
- Pencil
- Level
- Drill with 3/8" (9,5 mm) drill bit
- Jigsaw or Reciprocating Saw
- Phillips head screwdriver
- Measuring Tape
- Rubber Mallet (or hammer and block of wood
- Safety gear, mask, gloves & clamps recommended
Please read instructions & notes thoroughly before installation.
Endura Flap Double Flap Wall Mount
Step 1 Measure your Pet
- Tape the provided template onto the wall in the desired location. Use a level to straighten the edges of the template.
Step 2 Check Wall For Wires/Pipes
- Mark the centers of the four holes using a pencil or nail. Remove the template
- Drill a small hole in the middle to peek into the wall to check for wires/pipes. If you’re clear, move on to the next step to drill through the marked holes.
Step 3 Drill Holes & Rough Cutout
- Drill the marked 3⁄8” (9,5 mm) holes through the interior and exterior walls
- Now, cut the opening out along the lines
Step 4 Check Weather-Stripping

Step 5 Assemble Tunnel
- Trim the four sheet metal tunnel pieces so that they are 1⁄4“ (0,6 cm) shorter than the thickness of the wall. We recommend using a jigsaw, but you could use other metal cutting tools instead
Step 6 Bend Tunnel Tabs
- Bend the frame attachment tabs on the two smaller tunnel pieces 90 degrees upward along the perforations
Step 7 Attach Small Tunnel Pieces
- Remove the two screws at the top and two screws at the bottom of the Interior Flap Frame. If you removed the cover already, the OUTSIDE frame screw holes have threaded nuts in them and you can see them shine.
- Attach the smaller tunnel pieces to the top and bottom of the Interior Flap Frame using the two screws
Step 8 Attach Larger Tunnel Pieces
- Slide the larger tunnel pieces onto the finger tabs on the small top and bottom tunnel pieces. Bend the finger tabs down as shown
Step 9 Apply Silicone to Tunnel
- Apply a bead of the provided silicone sealant along the inside of the tunnel where it mates with the interior frame, and along the tunnel seams
Step 10 Position Interior Frame & Tunnel
- Place the Interior Frame, with the tunnel attached, into the opening in the wall from the inside of the building. Place the Exterior Frame into the tunnel.
Step 11 Attach Exterior Frame
- Insert the threaded rods with the barrel nuts into the four holes in the Interior Frame (the frame that has a locking cover), and screw the threaded rods into the Exterior Frame finger tight
Step 12 Remove Excess Threaded Rod
- With the pet door leveled and all four threaded rods tightened, wiggle the end of the threaded rods that are protruding out of the exterior frame until the ends snap off
Step 13 Seal with Silicone
- Apply a bead of silicone sealant along the inside of the tunnel where it mates with the exterior frame
- In addition to sealing inside the tunnel of the pet door we recommend that you also seal the outside frame around the pet door
Step 14 Insert Hole Plugs
- Tap the hole plugs into the Interior and Exterior Frames
Special Wall Situations
If your wall is over 8” (20,3 cm) thickness,the included tunnel will not be long enough. Your contractor can install the pet door in thicker walls by fabricating a custom tunnel. This can be done by using plywood, sheet metal, brick, or stone to line the cut out. One frame would be attached to the inside of the house and one frame to the outside. The provided template + instructions might not be accurate in a custom installation. Different hardware* will be required depending on what you are using for the tunnel and how you are mounting the frames to the wall. In all cases it is extremely important to make sure that the tunnel is sealed with silicone or caulking to prevent any damage from water leaking into the wall.
Wall Siding: You can choose to place the pet door on top of the siding. If you choose this option then you will need to make sure to take care of completely caulking and sealing any gaps that you have to prevent water damage to the wall.
You can also recess the pet door frame into the siding. In this case you would make the recommended rough opening according to the template. Then on the exterior you would cut away the siding only to frame the outside dimension of the pet door. Also be sure to properly caulk and seal around the frame. Some people choose to build a frame to surround the pet door, if you do this, you’ll have to take the same precautions with sealing the wall to prevent water damage.
Alternative Rough Cut Method
This method can be easier in some cases than trying to go through both walls with one pass.
- Step 1: Drill through the interior wall and draw lines connecting the outside part of the holes.
- Step 2: Use a hand saw or reciprocating saw to cut out the inside sheet rock along the drawn line.
- Step 3: Remove any insulation to expose the back of the exterior wall. Measuring very carefully and making sure all is level drill holes from the inside of exterior wall to the outside.
- Step 4: Tape off the inside opening with a trash bag. This will prevent the dust and debris from going all over and makes clean up much easier.
- Step 5: Make a mark from the inner side of the drilled holes on the exterior wall. It is a good idea to measure and level your outline from the outside, to ensure your hole will be the correct size.
- Step 6: Use the pilot holes and a circular saw (use a concrete blade if you have concrete or stucco exterior) to cut out the exterior. Place a piece of cardboard under the saw to prevent it from damaging the exterior.
- Step 7: Finish the opening with a reciprocating saw and if possible have a spotter inside.
Videos
The Endura Flap Pet Door
Design of the Endura Flap
Removing Side Magnets
Adjusting Your Endura Flap® Magnet Strength
The Leaf Blower Test
FAQ
|
I want to get the large pet door for my dog, but I am concerned about a person fitting through an x-large door. All Endura Flap Pet Doors come with a locking cover. This cover can be used to keep your pet inside by blocking access to the doggie door. It also can be used to keep intruders from entering your home. It is made from a special polymer that is as strong as 16 gauge steel. If you need to, you can purchase additional Endura Flap locking covers.We also have a product called the Watchdog Steel Security Pet Door Cover that provides maximum security for any pet door, complete with a combination lock and all. The cover comes in sizes large enough to fit even the XL dog doors for wall mount.Security consultants agree that dogs are a good burglar deterrent, especially one that barks. If you want to leave your pet door open make sure the gate to access your yard is locked and you post a Beware of Dog sign. |
|
Can a large dog & cat use the same double flap door flaps? We recommend cats use the Endura Flap Cat Doors for Walls. Our Endura Flap wall mount pet door has a strong magnetic seal which may be too strong for a cat. However, if you have cats and dogs sharing a door, you can decrease the magnetic resistance of the threshold on large and extra large sizes making it easier for a cat to use. For small or medium pet doors you can offset the magnets slightly which can also decrease the magnetic strength. |
|
I have a small and large dog sharing this door. Will my small dog be able to open the flaps on the extra large double flap dog door? It depends on the tenacity of your small dog. With the Endura flap door for walls you can decrease the magnetic resistance of the threshold on large and extra large sizes making it easier for your small dog to use. You will also want to make sure the door is mounted low enough for the small talk to walk through and high enough to clear the large dog's back. |
|
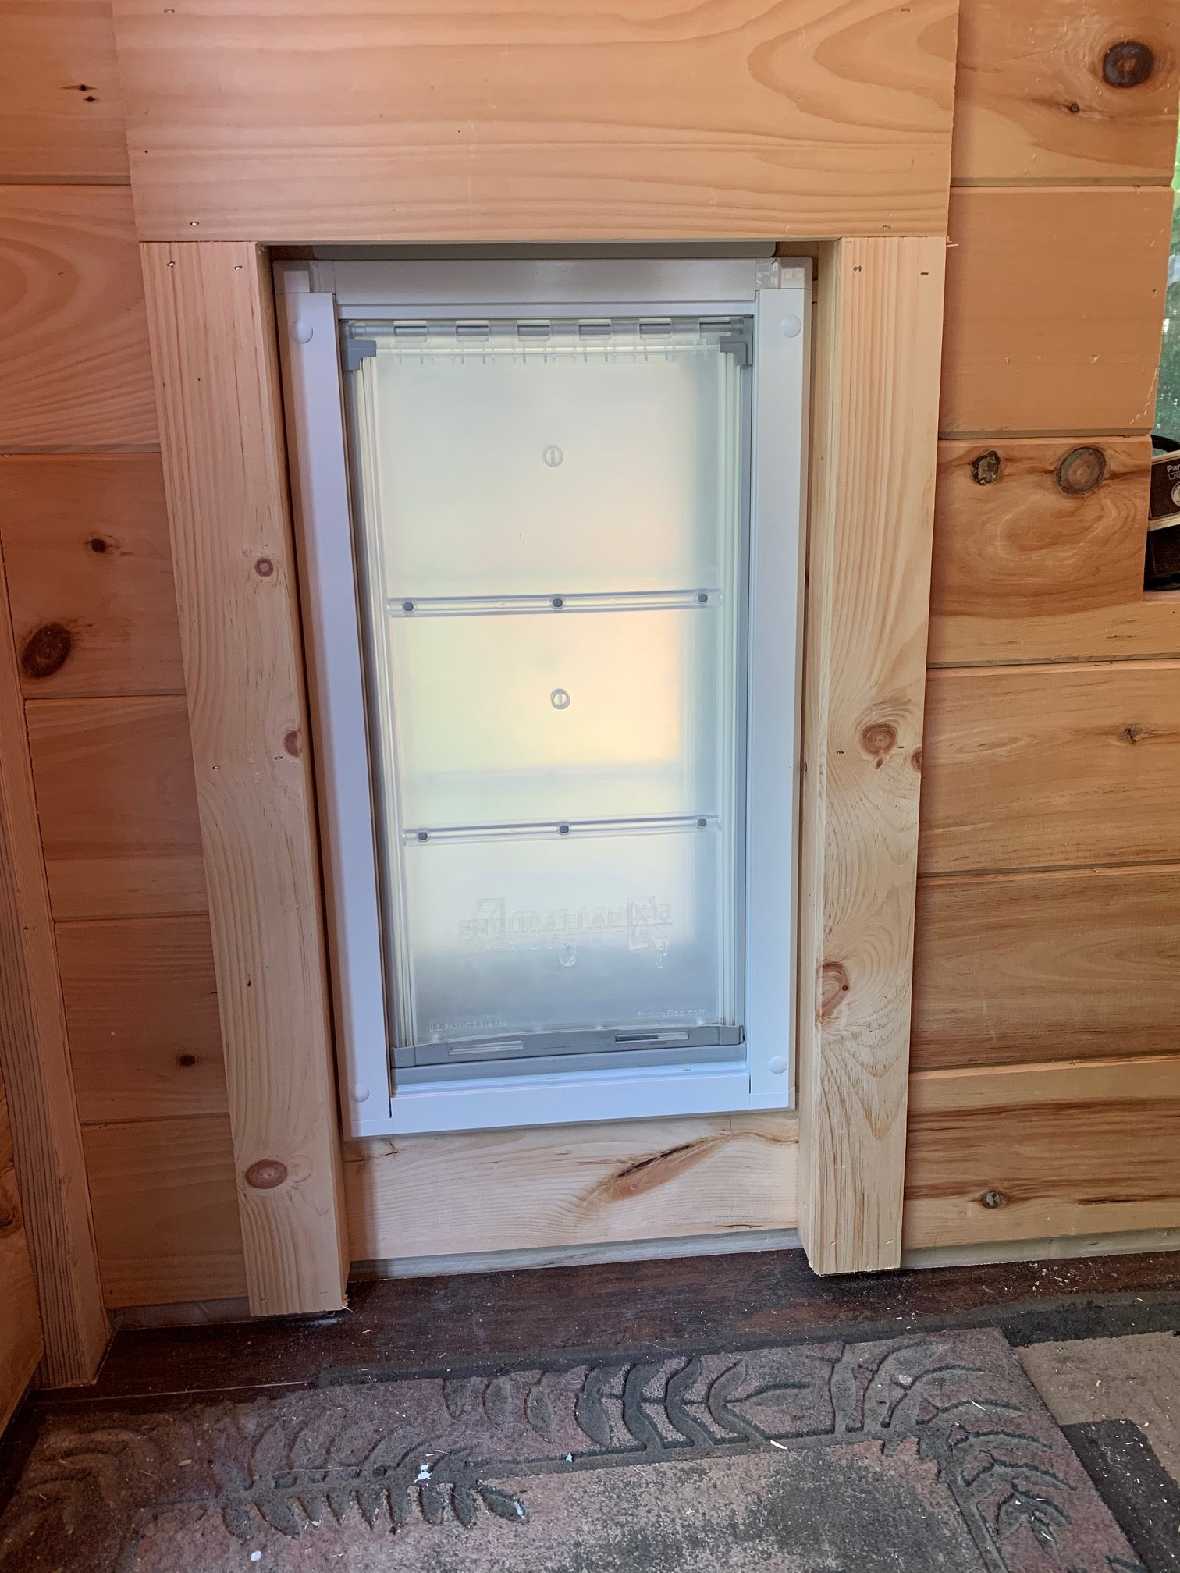
Is the flap on the interior or exterior frame for single flap model? For the single flap wall mount, the flap is attached to the interior frame. If you live in a very cold climate, we'd recommend the double flap model to keep snow out of the pet door tunnel. |
|
How do I know what size is best for my dog? When installing the Endura Flap wall door you want it to clear the top of your dog's back by 1-2 inches, minimum. You also want the step over to be comfortable. Lastly you want the width to allow your pet to go through without touching the sides. Here's a measurement guide with tips on how to determine the correct size. |
|
Our concrete basement wall is more than 8 inches thick. It says the wall thickness should be from 2 inches - 8 inches. Any ideas how we can make this work? You should order an Endura Flap dog door for Doors and build your own tunnel. Your tunnel can be make from wood or sheet metal. Note: make sure to caulk the seams to prevent leaks into your wall. |
|
Are the panels/flaps flexible? Seems like it would trap a dog if it backed up. The Endura Flap is slightly more rigid than other economy style flaps, but it is a safe, soft, flexible flap. It remains flexible in temperatures as low as -40°F. |
|
Is a single flap enough for extreme winter weather? A single Endura Flap on an exterior door is extremely energy-efficient and capable of withstanding winds up to 50 mph. It is the only door which allows you to increase the magnetic strength for increased wind resistance. It is recommended for timid pets. The double flap increases the energy-efficiency further. |
|
Does the door sound very loud when the dog goes in or out? When the flap gets to its resting place there is a snapping sound when the magnets employ. This sound let's you know the door is doing its job sealing out the elements and keeping your heated or cooled air inside. |
|
I do not have to contend with wind or rain, if I buy the single flap version of the wall dog door is it possible to add the second flap in the future? It is possible, but it not simple and can be quite costly. A short explanation is that you will need to buy a new tunnel, outer frame with flap and installation kit. The only item you will keep with your single flap in the wall pet door unit is the interior frame with flap. |
|
Where can I find a video that shows the installation of a wall mount pet door? You can find the installation video below the FAQs on this page. |
|
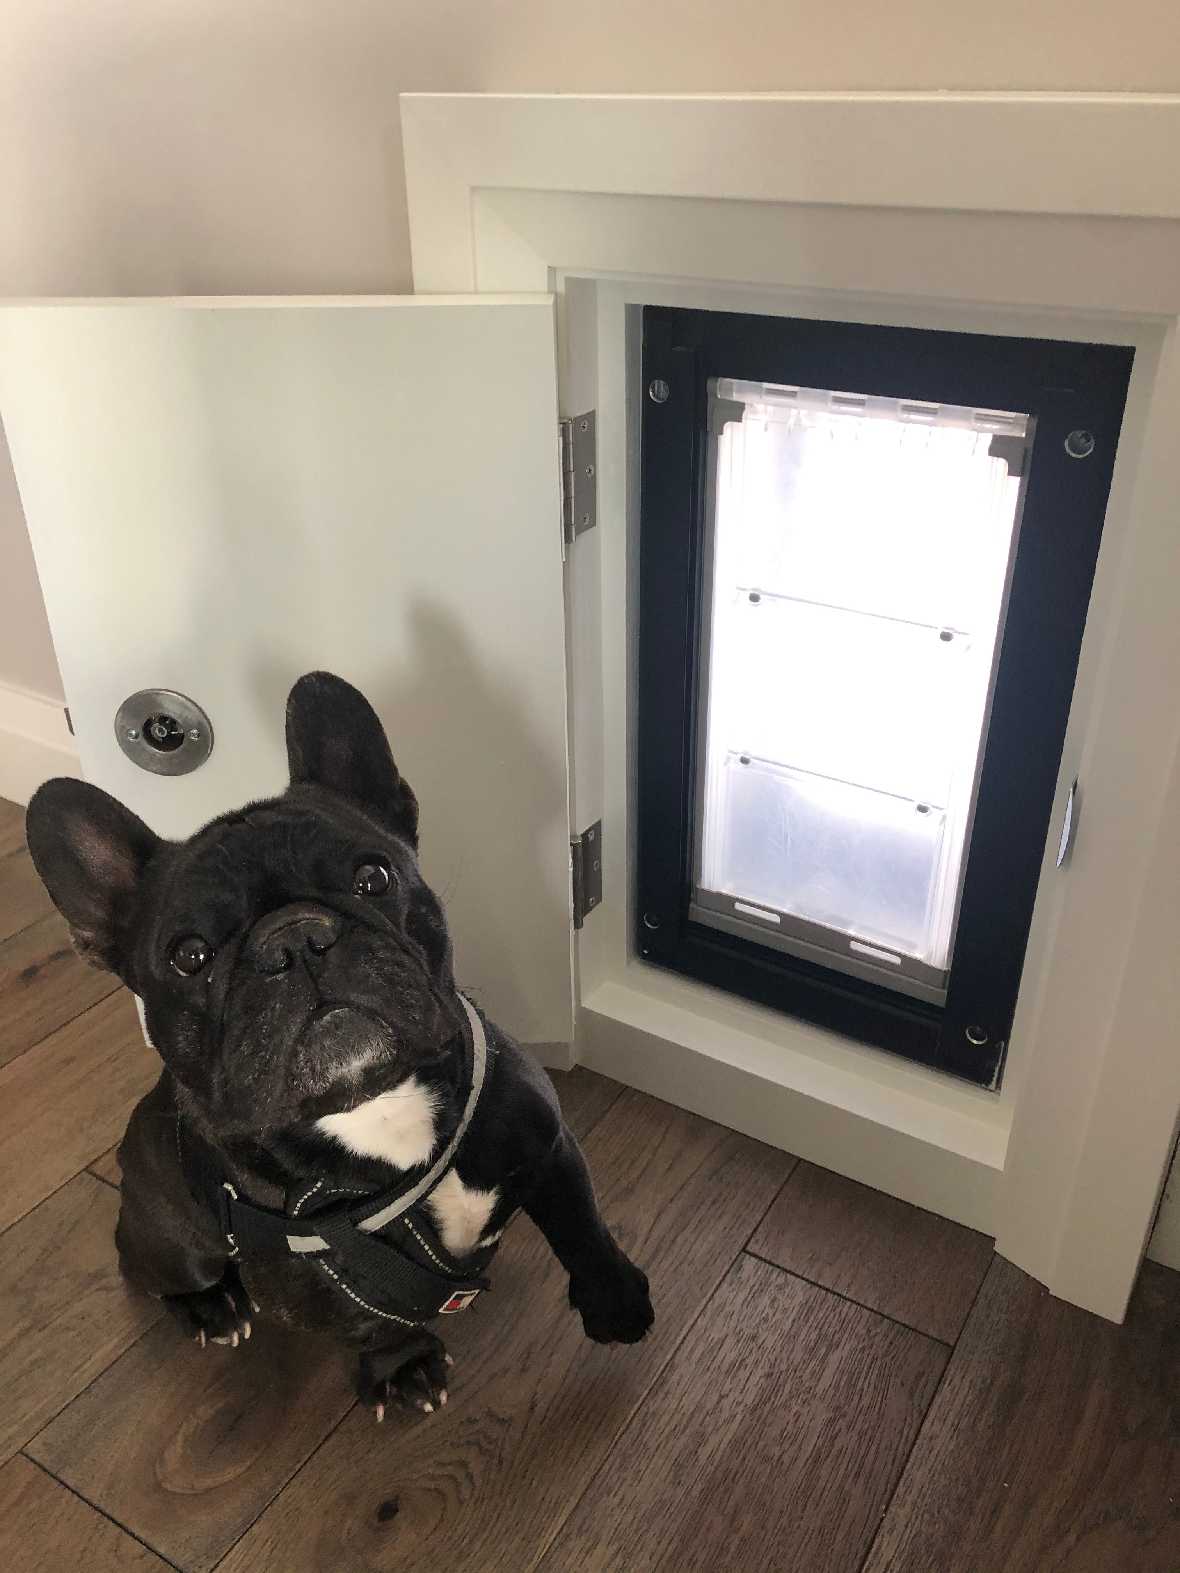
What side does the locking cover slide in? All locking covers slide in from the top. If you purchase a double flap model, the locking cover can be used on the inside or outside frame. If you purchase a single flap, the locking cover is on the interior frame (the side closest to the inside of your home). |
|
Other brands of pet doors with plastic flaps always warp and thus let in air. How do these flaps hold up over time? The Endura Flap is made with a special polymer called Polyolefin. It remains safe, soft and flexible in temperatures as low as -40°F. It does not yellow nor harden in the sun. The patented magnetic design ensures the door door seals well for years. In fact, the pet door and flap are backed by a Lifetime warranty. |
|
Are replacement flaps available? Yes, we carry Endura Replacement Flaps. They will work for all Endura models (wall mount, doggy door mount, kennel doors, window sashes, and sliding glass door patio pet doors). |
|
Are there color options other than white? Yes, they are available in Tan and Bronze (Black). |
|
I have a dog that I want to let out, but I want to prevent our cats from using it. Can the door be weighted to keep them from using it? You can increase the magnetic strength of the door with purchasing additional magnets here. Some people have found success doing this and keeping their cats inside. |
|
What material is the tunnel made out of? It is sturdy aluminum. |
|
Why is there a difference in flap size for the single versus the double flap models? Since each flap dual walled making them 7/8" thick as the pet pushes through the first flap will actually hit the second flap. This makes it so that there is a loss of about 1" of space a the top as they enter or exit. |
|
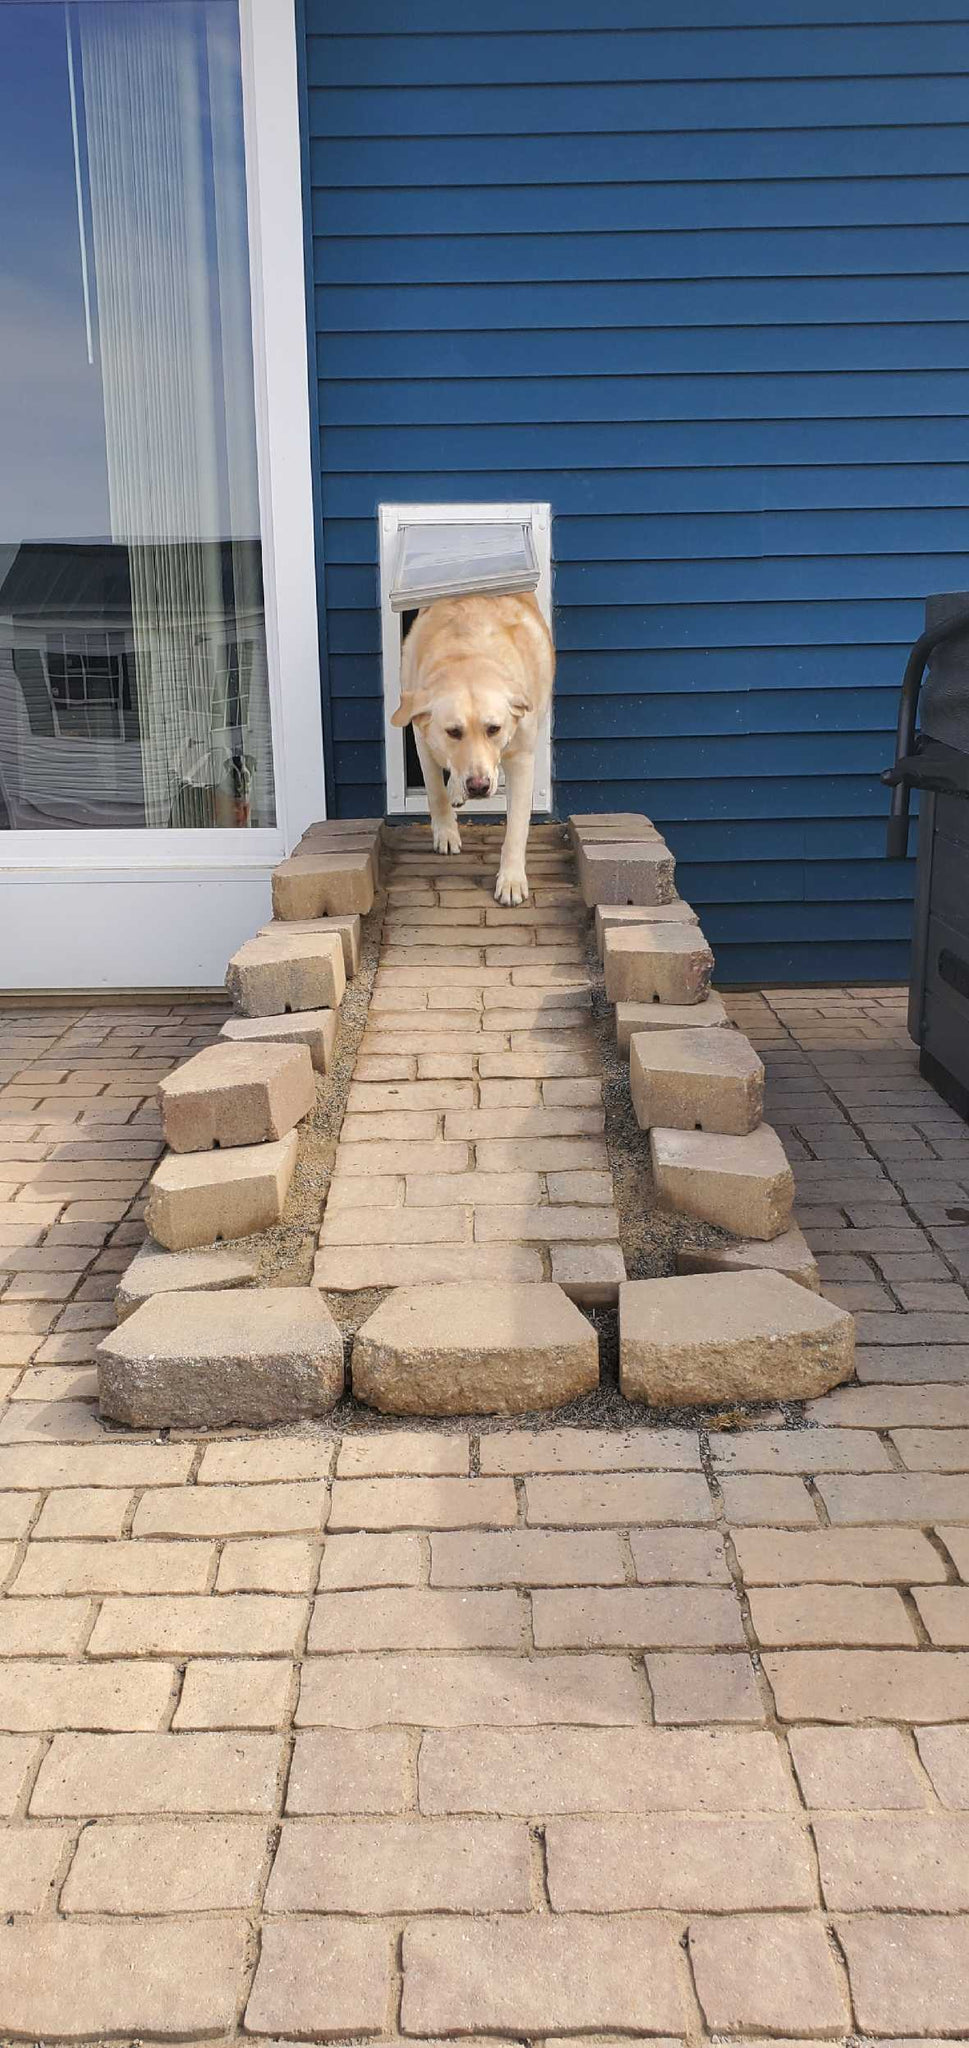
Is the patio pacific Endura Flap large wall mount - double flap large enough for a lab? In general we don't go by breed, however we have multiple dogs here that use that size door (stock code 04PP10 2) to get out to our yard. |
|
Is the Endura Door for Walls easy to install? Ease of installation is very subjective depending on skill set or access to certain tools that might be needed. The installation of a pet door say into a door is easier than installing it through a wall, however installing it into a door is more complicated than putting a pet door into a sliding door track, so it is also relative to what type of installation method. We recommend a contractor for installations going. |
|
I show part # 04PP12 2 on my packing slip, what size is that? That is the Endura for Walls in the Extra Large Double Flap. |
|
I see part # 04PP08 2 on the website, what size is that? That is Endura Dog Doors for Walls-Medium-Double Flap. |
|
I show part # 04PP08 1 on my packing slip, what size is that? That is the Endura Flap for wall installation Medium with the Single Flap (located on the inside of the house). |
|
What is the flap size for the Endura Dog Doors for Walls-Large-Double Flap? The flaps on the 04PP10-2 are 10" x 19", however the opening for the pet is about 10" x 18". |
|
What is the flap size of an Endura Flap 04PP10? The Endura Flap Pet Door for installation in walls is available in two opening sizes. The Single flap is 10" wide x 19" high and the Double flap is 10" wide by 18" high. |
|
Can I just get the endura wall kit? We do have those, give us a call at (800) 826-2871. For other Endura replacement pet products, see Endura replacement flaps and parts. |
|
How much does shipping cost? Shipping is calculated at checkout. |
Warranty
Patio Pacific Inc Endura Flap Pet Door Lifetime Warranty
The Endura Flap lifetime warranty guarantees that any defective parts returned with proof of purchase will be replaced by the manufacturer for free. This excludes damage caused by accident, improper installation, overuse, or misuse—including damage by pets or glass breakage.
Customer Reviews
Size Chart
- Small Single Flap: 6"w x 11"h Double Flap:6"w x 10"h
- Medium Single Flap: 8"w x 15"h Double Flap: 8"w x 14"h
- Large Single Flap: 10"w x 19"h Double Flap: 10"w x 18"h
- Extra Large Single Flap: 12"w x 23"h Double Flap: 12"w x 22"h
Flap Dimensions:
Single Flap:6"w x 11"h
Double Flap:6"w x 10"h
The entry way your dog goes through.Outside Frame Dimensions
9 7/16"w x 16"h
The outer edge of the pet door. Rough Cut Out:
8 5/8"w x 15"h
The size of the hole needed to fit your pet door into your wall.Flap Dimensions:
Single Flap:8"w x 15"h
Double Flap:8"w x 14"h
The entry way your dog goes through.Outside Frame Dimensions
11 1/2"w x 20"h
The outer edge of the pet door. Rough Cut Out:
10 5/8"w x 19 1/8"h
The size of the hole needed to fit your pet door into your wall.Flap Dimensions:
Single Flap:10"w x 19"h
Double Flap:10"w x 18"h
The entry way your dog goes through.Outside Frame Dimensions
13 9/16"w x 24"h
The outer edge of the pet door. Rough Cut Out:
12 5/8"w x 23 1/6"h
The size of the hole needed to fit your pet door into your wall.Flap Dimensions:
Single Flap:12"w x 23"h
Double Flap:12"w x 22"h
The entry way your dog goes through.Outside Frame Dimensions
15 5/8"w x 28"h
The outer edge of the pet door. Rough Cut Out:
14 11/16"w x 27 1/8"h
The size of the hole needed to fit your pet door into your wall.| Flap Size | Flap Dimension | Rough Cut Out | Outside Frame Dimension | Recommended Pet Height |
|---|---|---|---|---|
| Small | (Single) 6" w x 11" h | 8 5⁄8" w x 15" h | 9 7⁄16" w x 16" h | 9" - 16" |
| (Double) 6" w x 10" h | 8" - 14" | |||
| Medium | (Single) 8" w x 15" h | 10 5⁄8" w x 19 1⁄8" h | 11 1⁄2" w x 20" h | 9" - 22" |
| (Double) 8" w x 14" h | 8" - 21" | |||
| Large | (Single) 10" w x 19" h | 12 5⁄8" w x 23 1⁄16" h | 13 9⁄16" w x 24" | 9" - 28" |
| (Double) 10" w x 18" h | 8" - 27" | |||
| Extra Large | (Single) 12" w x 23" h | 14 11⁄16" w x 27 1⁄8" | 15 5⁄8" w x 28" h | 9" - 36" |
| (Double) 12" w x 22" h | 8" - 34" |
Do not know which size to get? Here is a measurement guide to help you out
Number of Flaps:
- 1 - Single Flap: On inside of wall (same side as locking cover)
- 2 - Double Flap: One on each side. The included dead-air-space and extra flap add significantly to the already considerable insulation and sealing values.
Installation Instructions
Difficulty
High
Steps
14
Time Required
2-3 hours
Sections
06
Flags
03
Parts (Single Flap Model)
- 1 Installation Template
- 8 Hole Plugs
- 1 Interior Frame (with flap)
- 1 Exterior Frame (no flap)
- 1 Locking Cover
- 4 Tunnel Pieces
- 4 Threaded Rods
- 1 Tube of Silicone
- 1 Jigsaw Blade
Tools
- Pencil
- Level
- Drill with 3/8" (9,5 mm) drill bit
- Jigsaw or Reciprocating Saw
- Phillips head screwdriver
- Measuring Tape
- Rubber Mallet (or hammer and block of wood
- Safety gear, mask, gloves & clamps recommended
Please read instructions & notes thoroughly before installation.
Single Flap Wall Mount
Step 1 Measure your Pet
- Tape the provided template onto the wall in the desired location. Use a level to straighten the edges of the template.
Step 2 Check Wall For Wires/Pipes
- Mark the centers of the four holes using a pencil or nail. Remove the template
- Drill a small hole in the middle to peek into the wall to check for wires/pipes. If you’re clear, move on to the next step to drill through the marked holes.
Step 3 Drill Holes & Rough Cutout
- Drill the marked 3⁄8” (9,5 mm) holes through the interior and exterior walls
- Now, cut the opening out along the lines
Step 4 Check Weather-Stripping
Step 5 Assemble Tunnel
- Trim the four sheet metal tunnel pieces so that they are 1⁄4“ (0.6 cm) shorter than the thickness of the wall. We recommend using a jigsaw, but you could use other metal cutting tools instead
Step 6 Bend Tunnel Tabs
- Bend the frame attachment tabs on the two smaller tunnel pieces 90 degrees upward along the perforations
Step 7 Attach Small Tunnel Pieces
- Remove the two screws at the top and two screws at the bottom of the Interior Flap Frame. If you removed the cover already, the OUTSIDE frame screw holes have threaded nuts in them and you can see them shine.
- Attach the smaller tunnel pieces to the top and bottom of the Interior Flap Frame using the two screws
Step 8 Attach Larger Tunnel Pieces
- Slide the larger tunnel pieces onto the finger tabs on the small top and bottom tunnel pieces. Bend the finger tabs down as shown
Step 9 Apply Silicone to Tunnel
- Apply a bead of the provided silicone sealant along the inside of the tunnel where it mates with the interior frame, and along the tunnel seams
Step 10 Position Interior Frame & Tunnel
- Place the Interior Frame, with the tunnel attached, into the opening in the wall from the inside of the building. Place the Exterior Frame into the tunnel.
Step 11 Attach Exterior Frame
- Insert the threaded rods with the barrel nuts into the four holes in the Interior Frame (the frame that has a locking cover), and screw the threaded rods into the Exterior Frame finger tight
Step 12 Remove Excess Threaded Rod
- With the pet door leveled and all four threaded rods tightened, wiggle the end of the threaded rods that are protruding out of the exterior frame until the ends snap off
Step 13 Seal with Silicone
- Apply a bead of silicone sealant along the inside of the tunnel where it mates with the exterior frame
- In addition to sealing inside the tunnel of the pet door we recommend that you also seal the outside frame around the pet door
Step 14 Insert Hole Plugs
- Tap the hole plugs into the Interior and Exterior Frames
Difficulty
High
Steps
14
Time Required
2-3 hours
Sections
06
Flags
03
Parts (Double Flap Model)
- 1 Installation Template
- 8 Hole Plugs
- 1 Interior Frame with Flap
- 1 Exterior Frame with Flap
- 1 Locking Cover
- 4 Tunnel Pieces
- 4 Threaded Rods
- 1 Tube of Silicone
- 1 Jigsaw Blade
Tools
- Pencil
- Level
- Drill with 3/8" (9,5 mm) drill bit
- Jigsaw or Reciprocating Saw
- Phillips head screwdriver
- Measuring Tape
- Rubber Mallet (or hammer and block of wood
- Safety gear, mask, gloves & clamps recommended
Please read instructions & notes thoroughly before installation.
Endura Flap Double Flap Wall Mount
Step 1 Measure your Pet
- Tape the provided template onto the wall in the desired location. Use a level to straighten the edges of the template.
Step 2 Check Wall For Wires/Pipes
- Mark the centers of the four holes using a pencil or nail. Remove the template
- Drill a small hole in the middle to peek into the wall to check for wires/pipes. If you’re clear, move on to the next step to drill through the marked holes.
Step 3 Drill Holes & Rough Cutout
- Drill the marked 3⁄8” (9,5 mm) holes through the interior and exterior walls
- Now, cut the opening out along the lines
Step 4 Check Weather-Stripping
Step 5 Assemble Tunnel
- Trim the four sheet metal tunnel pieces so that they are 1⁄4“ (0,6 cm) shorter than the thickness of the wall. We recommend using a jigsaw, but you could use other metal cutting tools instead
Step 6 Bend Tunnel Tabs
- Bend the frame attachment tabs on the two smaller tunnel pieces 90 degrees upward along the perforations
Step 7 Attach Small Tunnel Pieces
- Remove the two screws at the top and two screws at the bottom of the Interior Flap Frame. If you removed the cover already, the OUTSIDE frame screw holes have threaded nuts in them and you can see them shine.
- Attach the smaller tunnel pieces to the top and bottom of the Interior Flap Frame using the two screws
Step 8 Attach Larger Tunnel Pieces
- Slide the larger tunnel pieces onto the finger tabs on the small top and bottom tunnel pieces. Bend the finger tabs down as shown
Step 9 Apply Silicone to Tunnel
- Apply a bead of the provided silicone sealant along the inside of the tunnel where it mates with the interior frame, and along the tunnel seams
Step 10 Position Interior Frame & Tunnel
- Place the Interior Frame, with the tunnel attached, into the opening in the wall from the inside of the building. Place the Exterior Frame into the tunnel.
Step 11 Attach Exterior Frame
- Insert the threaded rods with the barrel nuts into the four holes in the Interior Frame (the frame that has a locking cover), and screw the threaded rods into the Exterior Frame finger tight
Step 12 Remove Excess Threaded Rod
- With the pet door leveled and all four threaded rods tightened, wiggle the end of the threaded rods that are protruding out of the exterior frame until the ends snap off
Step 13 Seal with Silicone
- Apply a bead of silicone sealant along the inside of the tunnel where it mates with the exterior frame
- In addition to sealing inside the tunnel of the pet door we recommend that you also seal the outside frame around the pet door
Step 14 Insert Hole Plugs
- Tap the hole plugs into the Interior and Exterior Frames
Special Wall Situations
If your wall is over 8” (20,3 cm) thickness,the included tunnel will not be long enough. Your contractor can install the pet door in thicker walls by fabricating a custom tunnel. This can be done by using plywood, sheet metal, brick, or stone to line the cut out. One frame would be attached to the inside of the house and one frame to the outside. The provided template + instructions might not be accurate in a custom installation. Different hardware* will be required depending on what you are using for the tunnel and how you are mounting the frames to the wall. In all cases it is extremely important to make sure that the tunnel is sealed with silicone or caulking to prevent any damage from water leaking into the wall.
Wall Siding: You can choose to place the pet door on top of the siding. If you choose this option then you will need to make sure to take care of completely caulking and sealing any gaps that you have to prevent water damage to the wall.
You can also recess the pet door frame into the siding. In this case you would make the recommended rough opening according to the template. Then on the exterior you would cut away the siding only to frame the outside dimension of the pet door. Also be sure to properly caulk and seal around the frame. Some people choose to build a frame to surround the pet door, if you do this, you’ll have to take the same precautions with sealing the wall to prevent water damage.
Alternative Rough Cut Method
This method can be easier in some cases than trying to go through both walls with one pass.
- Step 1: Drill through the interior wall and draw lines connecting the outside part of the holes.
- Step 2: Use a hand saw or reciprocating saw to cut out the inside sheet rock along the drawn line.
- Step 3: Remove any insulation to expose the back of the exterior wall. Measuring very carefully and making sure all is level drill holes from the inside of exterior wall to the outside.
- Step 4: Tape off the inside opening with a trash bag. This will prevent the dust and debris from going all over and makes clean up much easier.
- Step 5: Make a mark from the inner side of the drilled holes on the exterior wall. It is a good idea to measure and level your outline from the outside, to ensure your hole will be the correct size.
- Step 6: Use the pilot holes and a circular saw (use a concrete blade if you have concrete or stucco exterior) to cut out the exterior. Place a piece of cardboard under the saw to prevent it from damaging the exterior.
- Step 7: Finish the opening with a reciprocating saw and if possible have a spotter inside.
Videos
The Endura Flap Pet Door
Design of the Endura Flap
Removing Side Magnets
Adjusting Your Endura Flap® Magnet Strength
The Leaf Blower Test
FAQ
|
I want to get the large pet door for my dog, but I am concerned about a person fitting through an x-large door. All Endura Flap Pet Doors come with a locking cover. This cover can be used to keep your pet inside by blocking access to the doggie door. It also can be used to keep intruders from entering your home. It is made from a special polymer that is as strong as 16 gauge steel. If you need to, you can purchase additional Endura Flap locking covers.We also have a product called the Watchdog Steel Security Pet Door Cover that provides maximum security for any pet door, complete with a combination lock and all. The cover comes in sizes large enough to fit even the XL dog doors for wall mount.Security consultants agree that dogs are a good burglar deterrent, especially one that barks. If you want to leave your pet door open make sure the gate to access your yard is locked and you post a Beware of Dog sign. |
|
Can a large dog & cat use the same double flap door flaps? We recommend cats use the Endura Flap Cat Doors for Walls. Our Endura Flap wall mount pet door has a strong magnetic seal which may be too strong for a cat. However, if you have cats and dogs sharing a door, you can decrease the magnetic resistance of the threshold on large and extra large sizes making it easier for a cat to use. For small or medium pet doors you can offset the magnets slightly which can also decrease the magnetic strength. |
|
I have a small and large dog sharing this door. Will my small dog be able to open the flaps on the extra large double flap dog door? It depends on the tenacity of your small dog. With the Endura flap door for walls you can decrease the magnetic resistance of the threshold on large and extra large sizes making it easier for your small dog to use. You will also want to make sure the door is mounted low enough for the small talk to walk through and high enough to clear the large dog's back. |
|
Is the flap on the interior or exterior frame for single flap model? For the single flap wall mount, the flap is attached to the interior frame. If you live in a very cold climate, we'd recommend the double flap model to keep snow out of the pet door tunnel. |
|
How do I know what size is best for my dog? When installing the Endura Flap wall door you want it to clear the top of your dog's back by 1-2 inches, minimum. You also want the step over to be comfortable. Lastly you want the width to allow your pet to go through without touching the sides. Here's a measurement guide with tips on how to determine the correct size. |
|
Our concrete basement wall is more than 8 inches thick. It says the wall thickness should be from 2 inches - 8 inches. Any ideas how we can make this work? You should order an Endura Flap dog door for Doors and build your own tunnel. Your tunnel can be make from wood or sheet metal. Note: make sure to caulk the seams to prevent leaks into your wall. |
|
Are the panels/flaps flexible? Seems like it would trap a dog if it backed up. The Endura Flap is slightly more rigid than other economy style flaps, but it is a safe, soft, flexible flap. It remains flexible in temperatures as low as -40°F. |
|
Is a single flap enough for extreme winter weather? A single Endura Flap on an exterior door is extremely energy-efficient and capable of withstanding winds up to 50 mph. It is the only door which allows you to increase the magnetic strength for increased wind resistance. It is recommended for timid pets. The double flap increases the energy-efficiency further. |
|
Does the door sound very loud when the dog goes in or out? When the flap gets to its resting place there is a snapping sound when the magnets employ. This sound let's you know the door is doing its job sealing out the elements and keeping your heated or cooled air inside. |
|
I do not have to contend with wind or rain, if I buy the single flap version of the wall dog door is it possible to add the second flap in the future? It is possible, but it not simple and can be quite costly. A short explanation is that you will need to buy a new tunnel, outer frame with flap and installation kit. The only item you will keep with your single flap in the wall pet door unit is the interior frame with flap. |
|
Where can I find a video that shows the installation of a wall mount pet door? You can find the installation video below the FAQs on this page. |
|
What side does the locking cover slide in? All locking covers slide in from the top. If you purchase a double flap model, the locking cover can be used on the inside or outside frame. If you purchase a single flap, the locking cover is on the interior frame (the side closest to the inside of your home). |
|
Other brands of pet doors with plastic flaps always warp and thus let in air. How do these flaps hold up over time? The Endura Flap is made with a special polymer called Polyolefin. It remains safe, soft and flexible in temperatures as low as -40°F. It does not yellow nor harden in the sun. The patented magnetic design ensures the door door seals well for years. In fact, the pet door and flap are backed by a Lifetime warranty. |
|
Are replacement flaps available? Yes, we carry Endura Replacement Flaps. They will work for all Endura models (wall mount, doggy door mount, kennel doors, window sashes, and sliding glass door patio pet doors). |
|
Are there color options other than white? Yes, they are available in Tan and Bronze (Black). |
|
I have a dog that I want to let out, but I want to prevent our cats from using it. Can the door be weighted to keep them from using it? You can increase the magnetic strength of the door with purchasing additional magnets here. Some people have found success doing this and keeping their cats inside. |
|
What material is the tunnel made out of? It is sturdy aluminum. |
|
Why is there a difference in flap size for the single versus the double flap models? Since each flap dual walled making them 7/8" thick as the pet pushes through the first flap will actually hit the second flap. This makes it so that there is a loss of about 1" of space a the top as they enter or exit. |
|
Is the patio pacific Endura Flap large wall mount - double flap large enough for a lab? In general we don't go by breed, however we have multiple dogs here that use that size door (stock code 04PP10 2) to get out to our yard. |
|
Is the Endura Door for Walls easy to install? Ease of installation is very subjective depending on skill set or access to certain tools that might be needed. The installation of a pet door say into a door is easier than installing it through a wall, however installing it into a door is more complicated than putting a pet door into a sliding door track, so it is also relative to what type of installation method. We recommend a contractor for installations going. |
|
I show part # 04PP12 2 on my packing slip, what size is that? That is the Endura for Walls in the Extra Large Double Flap. |
|
I see part # 04PP08 2 on the website, what size is that? That is Endura Dog Doors for Walls-Medium-Double Flap. |
|
I show part # 04PP08 1 on my packing slip, what size is that? That is the Endura Flap for wall installation Medium with the Single Flap (located on the inside of the house). |
|
What is the flap size for the Endura Dog Doors for Walls-Large-Double Flap? The flaps on the 04PP10-2 are 10" x 19", however the opening for the pet is about 10" x 18". |
|
What is the flap size of an Endura Flap 04PP10? The Endura Flap Pet Door for installation in walls is available in two opening sizes. The Single flap is 10" wide x 19" high and the Double flap is 10" wide by 18" high. |
|
Can I just get the endura wall kit? We do have those, give us a call at (800) 826-2871. For other Endura replacement pet products, see Endura replacement flaps and parts. |
|
How much does shipping cost? Shipping is calculated at checkout. |
Warranty
Patio Pacific Inc Endura Flap Pet Door Lifetime Warranty
The Endura Flap lifetime warranty guarantees that any defective parts returned with proof of purchase will be replaced by the manufacturer for free. This excludes damage caused by accident, improper installation, overuse, or misuse—including damage by pets or glass breakage.